TotalView
Description
TotalView from Perforce Software is a parallel software debugger for complex C, C++, Fortran, and CUDA applications. It provides both X Window-based Graphical User Interface (GUI) and command line interface (CLI), and script based environments for debugging.
The TotalView documentation web page is a good resource for learning useful TotalView features, beyond the basic materials covered here. Another source is the $TOTALVIEW_DOC/doc/pdf directory (the TOTALVIEW_DIR environment variable is defined when totalview module is loaded). There are manuals in PDF format.
New UI vs. Classic UI
TotalView introduced a new modernized user interface (UI) a few years ago. The new UI is the default mode on NERSC machines. A small number of features are still not directly accessible from the new UI, but most of the existing features are available, and they will soon be supported in the new UI.
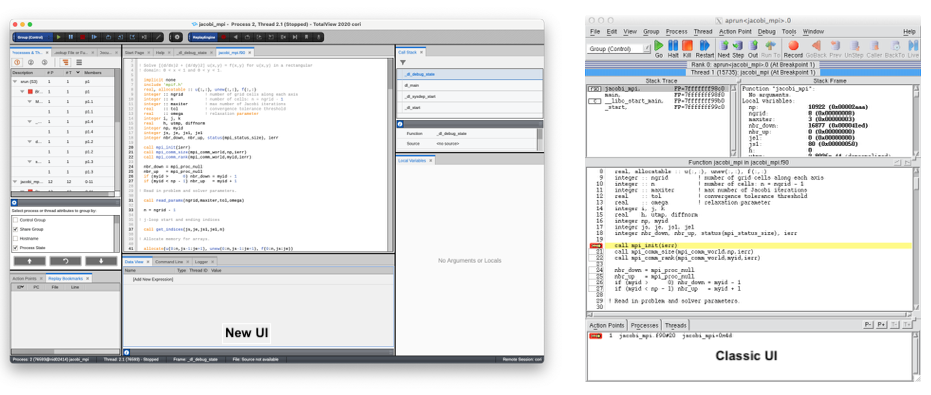
To see which UI you are using for your TotalView debugging sessions, check the file, $HOME/.totalview/.tvnewui. It contains one or three strings. If the first string is true, you are using the new UI.
To change your default UI, you can edit the file directly. If you want, you can delete the entire $HOME/.totalview directory and regenerate it with the new UI set as your UI, by starting a TotalView session. Note that, by deleting the directory, you will lose info about your previous debugging sessions. Another way to change the UI is through the tool's 'File > Preferences...' menu. Select the 'Display' tab, and check the radio button for your favorite UI.
You can temporarily override your default UI by adding the -newUI or -classicUI flag to your totalview command, as in 'totalview -classicUI ....' Alternatively, you can set the environment variable TVNEWUI to True or False.
Slow X-Window GUI Responses
Running an X window GUI application interactively can be painful due to slow responses when it is launched from a remote system over internet. There are several ways to cope with the problem.
As usual, NERSC recommends to use the free ThinLinc software because the performance of any X Window-based GUI (not just TotalView's) can be greatly improved.
TotalView comes up with two different solutions: Remote Display Client and Remote Connection, which are explained below. TotalView seems to promote the latter more because of its simplicity in deployment.
Remote Display Client
Note
RDC doesn't work for Perlmutter as the system doesn't support X Window utilities, yet.
TotalView's Remote Display Client (RDC) is a free tool shipped with TotalView that allows developers to easily establish a remote desktop session by automatically setting up a remote display environment from a remote system, securely across multiple connecting computers, and to the user's laptop.
RDC installation packages for Windows (64-bit), Linux and macOS (Intel chips) are available from the TotalView installation directory:
$ module load totalview
$ ls $TOTALVIEW_DIR/remote_display
-rwxrwxr-x  1 swowner swowner 14365179 Sep  9 11:29 RDC_installer_1.5.2-linux-x86-64.run
-rwxrwxr-x  1 swowner swowner 12253782 Sep  9 11:31 RDC_installer_1.5.2-macos.dmg
-rwxrwxr-x  1 swowner swowner 34012184 Sep  9 11:31 RDC_installer_1.5.2-windows-x64.exe
If your local laptop/desktop is a Mac, you will also need to install 'VNC Viewer.' If it is a Linux machine, xterm should be available there.
On Linux, invoke the client with the command ./remote_display_client.sh. On macOS, run the TVRemoteDisplayClient application from the /Applications/TotalView_RDC directory. On Windows, either click the desktop icon or use the TVT Remote Display item in the start menu to launch the remote display dialog.
To create a RDC connection configuration for Perlmutter, fill out the following fields:
- Remote Host:
perlmutter.nersc.gov - User Name: Your username
- Path to TotalView on the Remote Host:
/global/common/software/nersc9/toolworks/totalview.default/bin/totalview - Path to MemoryScape on the Remote Host:
/global/common/software/nersc9/toolworks/memoryscape.default/bin/memscape
You can save the configuration for later use by clicking the diskette icon in the 'Session Profiles' box on the left. The configuration in the following example is named perlmutter.
To connect to the remote host (i.e., Perlmutter) and start a debugging session there with RDC, click the 'Launch Debug Session' button. This will open two windows, one for the laptop/desktop and the other for ssh connection to the remote host. If you have set ssh to use the ssh keys generated via sshproxy, you will be automatically logged in to the NERSC host. Otherwise, you will be prompted to authenticate with password and OTP (One-Time Password).
With successful authentication to the NERSC host, RDC opens a desktop window environment containing an xterm window opened on the host and the TotalView startup window inside. For simplicity for now, close the startup window by clicking the Cancel button and exit TotalView by clicking Exit in the File menu.
For a debugging session on compute nodes, start an interactive batch job first and run TotalView in the xterm window provided inside the RDC desktop environment. For that, please go to the section, 'Starting a Job with TotalView' below, and continue from the salloc command part.
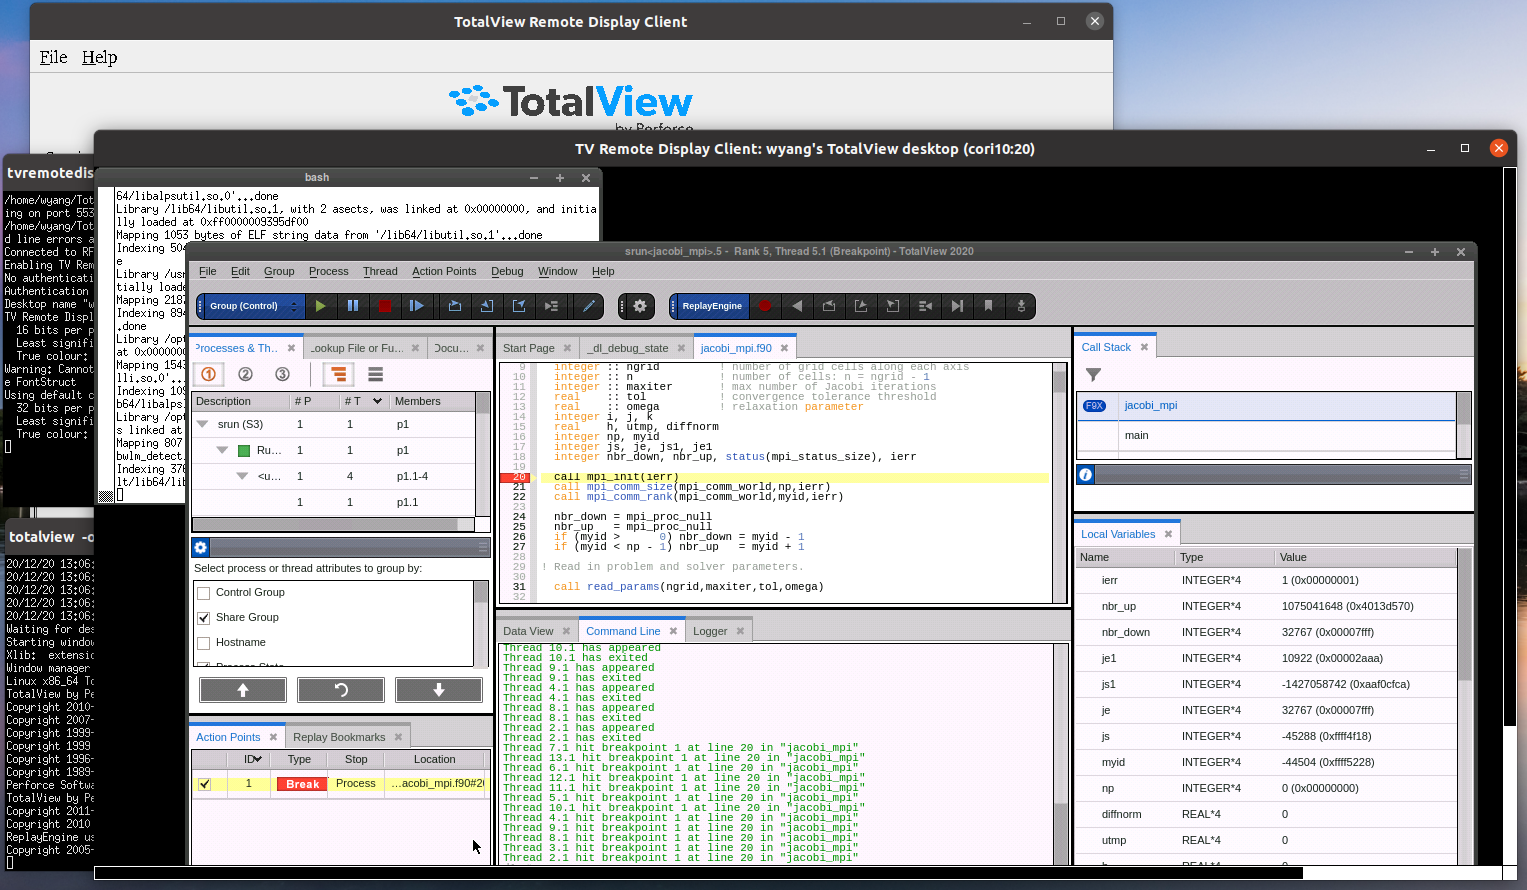
To end the RDC session, stop the interactive batch job by typing exit in the xterm window. Click the 'End Debug Session' button in the RDC.
For more information on the RDC, please check $TOTALVIEW_DOC/doc/pdf/TotalView_Remote_Display.pdf.
Remote Connections
TotalView’s Remote Connection feature allows you to run the debugger user interface from your local system, such as your laptop, and efficiently, and securely, conduct your debugging session on a remote system or cluster.
This is, in essence, to run TotalView on your laptop/desktop and establish a reverse connection between NERSC compute nodes and the local client for relaying debugging session activities in real time. Note that TotalView uses different terms ("remote connection," "remote debugging," "reverse connections" ...) in the context of describing this debugging methodology.
In order to use this feature, you will have to install the full TotalView package on your laptop/desktop after downloading an installation package from the TotalView download site. You don't need to purchase a TotalView license for your laptop/desktop in this case as you only display a debugging session in real time there while the actual debugging session is run on the NERSC host.
Start TotalView on your laptop/desktop, and go to the 'Preferences...' item from the 'TotalView' pull-down menu. Select the 'REMOTE CONNECTIONS' tab, and click 'create a new configuration' to create a new remote host connection. Fill the fields as follows for Perlmutter:
- Connection Name:
perlmutter - Remote Host(s):
<username>@perlmutter.nersc.gov - Remote Command(s):
module load totalview
You don't have to fill the other fields (e.g., 'Private Key File').
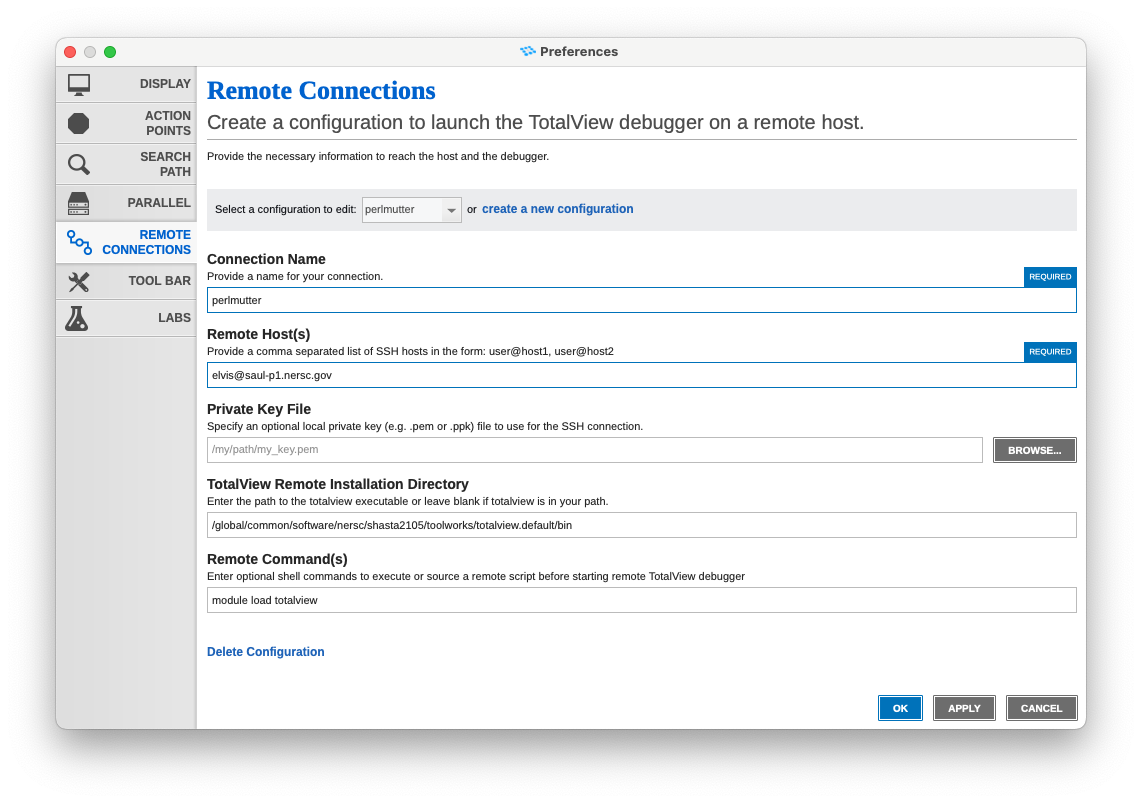
With the configuration set and now back on the Start Page, select the remote connection configuration (e.g., perlmutter) from the 'Launch Remote Debugger' dropdown:

This will create an ssh connection to the remote host (e.g., Perlmutter). If you have set ssh to use the ssh keys generated via sshproxy, an ssh connection is established automatically. Otherwise, you will be prompted to enter password and OTP.
To start a debugging session, open a terminal on your laptop/desktop, ssh to the host, and start an interactive batch job. For this, proceed to the section, 'Starting a Job with TotalView' below.
To stop the remote connection, simply select 'Off' from the 'Launch Remote Debugger' dropdown.
Compiling Code to Run with TotalView
In order to use TotalView, code must be compiled with the -g option. With the Intel compiler, you may have to add the -O0 flag, too. We also recommend that you do not run with optimization turned on, flags such as -fast.
Fortran Example
ftn -g -O0 -o testTV_ex testTV.f
C Example
cc -g -O0 -o testTV_ex testTV.c
Starting a Job with TotalView
You can log in to a NERSC machine with (e.g., Perlmutter) with an X window forwarding enabled, by using using the -X or -Y option to the ssh command. The -Y option often works better for macOS. However, X window forwarding is strongly discouraged because of slow interactive responses. Use the ThinLinc tool, the Remote Display Client or the Remote Connection which are explained below.
Then start an interactive batch session using the debug or interactive QOS:
salloc -N <numNodes> -t <walltime> -q interactive -C knl
To use TotalView, first load the TotalView module to set the correct environment settings with the following command:
module load totalview
With most of the versions available on the systems, you will be able to launch the debugger with the totalview command followed by the name of the executable to debug, as you normally did before NERSC switched to Slurm for batch scheduling.:
totalview srun -a -n <numTasks> ./testTV_ex
If you are using the remote connection method explained above, replace totalview with tvconnect and omit the -a flag, as shown below:
tvconnect srun -n <numTasks> ./testTV_ex
which sends a reverse connect request to the local laptop/desktop. When the local client detects such a request, a pop-up window appears:
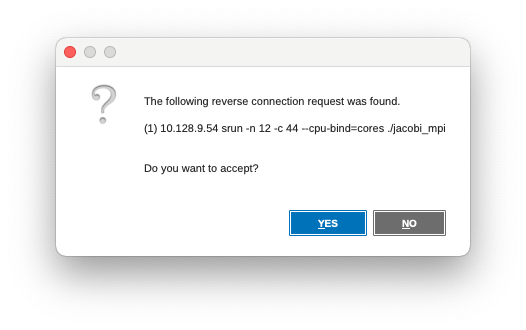
Press YES to accept the reverse connection request. Now your local client displays live debugging session in real time.
Note
TotalView allows you to conduct multiple debugging sessions at a time but once a session has been started it will not continue to listen for new reverse connections. This setting is in place to not disturb your focus on the current debugging session. You can instruct TotalView to listen for new reverse connections by clicking the Listen For Reverse Connections toggle on the Start Page or the Listen for Reverse Connection menu option under the File menu.
Instructions from here will be the same, whether you use the remote connection method or not.
The TotalView GUI will pop up displaying the srun.wrapper.c. Press Go (green right triangle) to start debugging.

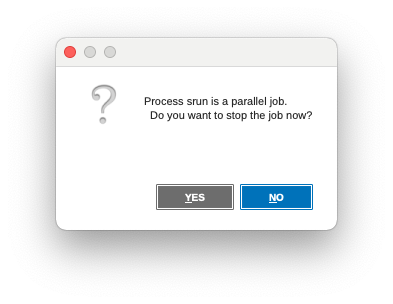
The TotalView GUI, then, says that the srun process is a parallel job and asks if you want to stop it. Select YES in order that you can set breakpoints.
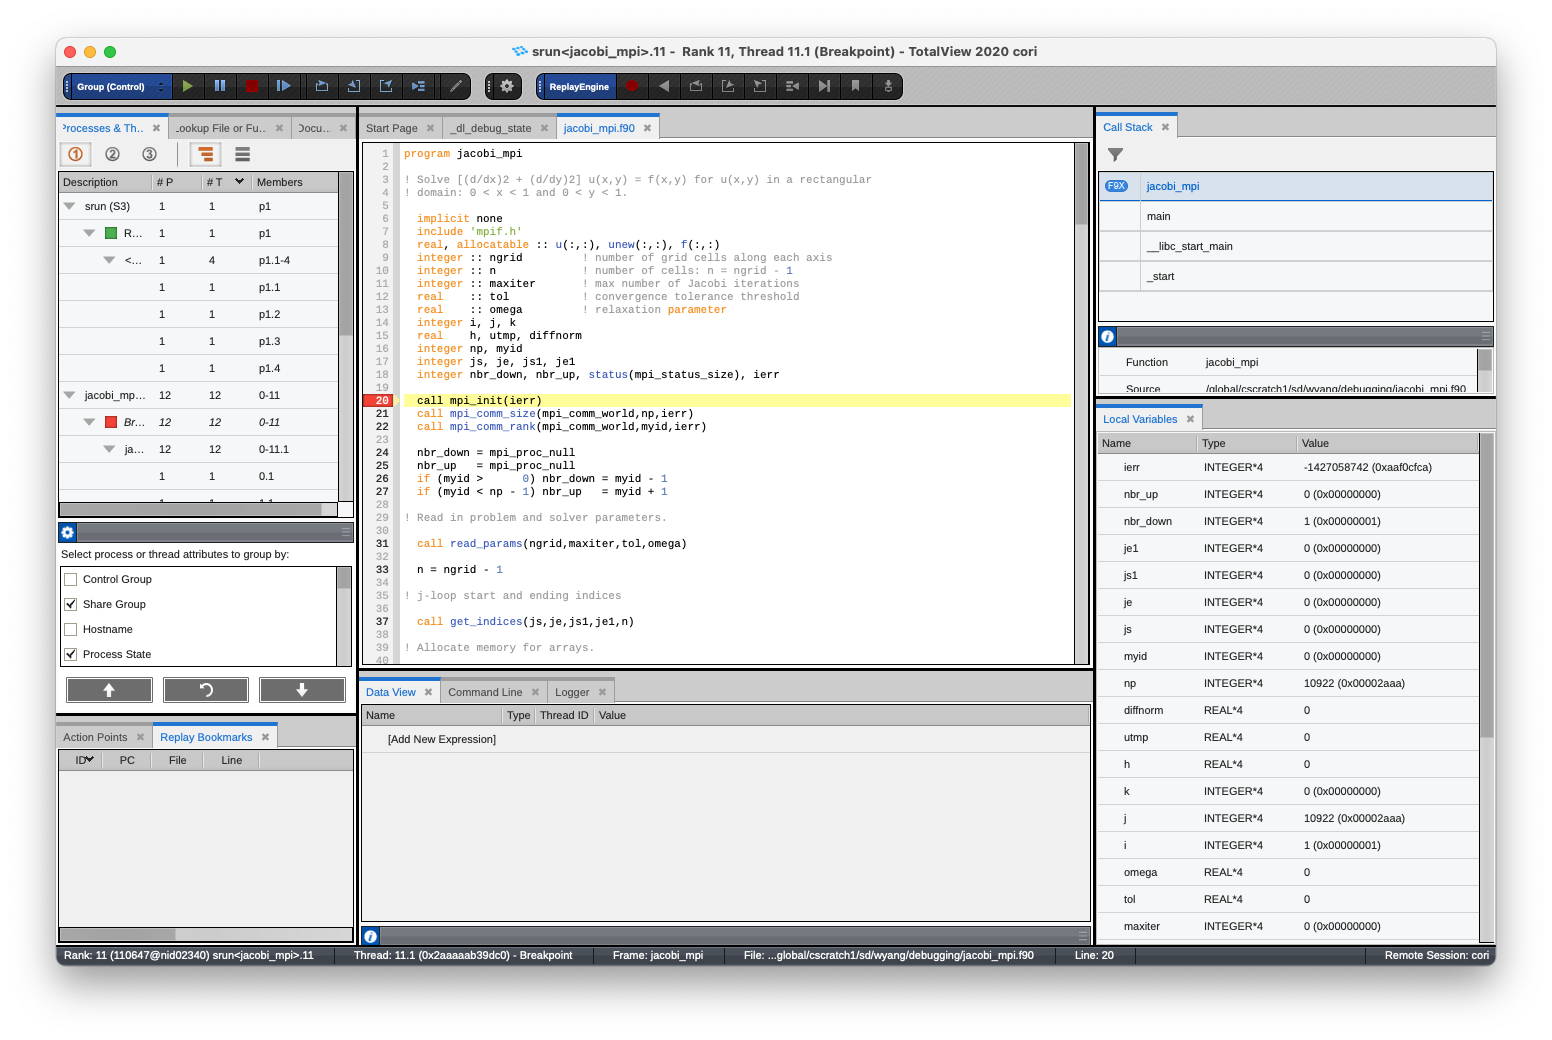
The TotalView window will then display the source code of your application.
To start debugging, create break points by clicking on line numbers in the source pane. Press Go to continue debugging. The MPI processes run to the breakpoint as can be seen in the Processes and Threads window on the left-hand side. You can use other buttons ('Next', 'Step', 'Out', etc.).
Sometimes, you may find that a certain TotalView version (often the most recent version) cannot be started using the above method because it doesn't contain a Cray-customization for Slurm because of unavailability of one yet. For such a version you have to follow the following steps to start a debugging session. Just type 'totalview' at a Unix prompt. A window titled 'TotalView Debugger' will open.
totalview
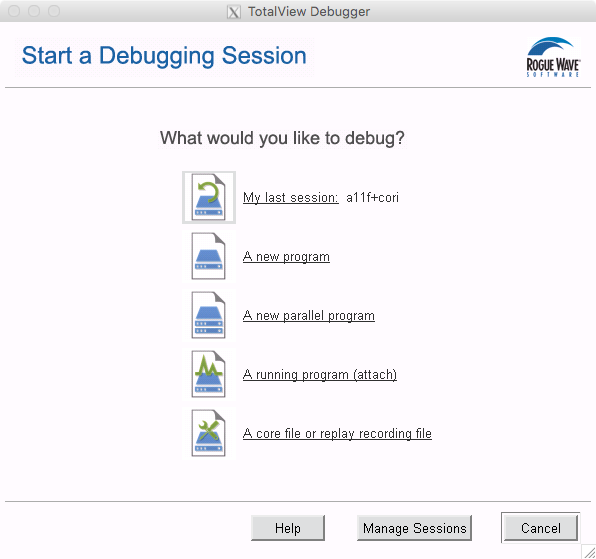
Click on 'A new parallel program'. This will open the 'Parallel Program Session' window. Select 'SLURM' for the Parallel System Name, and set the number of MPI tasks and the number of compute nodes used. The example below is to start a 16 MPI task (-n 16) application running using 2 compute nodes (-N 2).
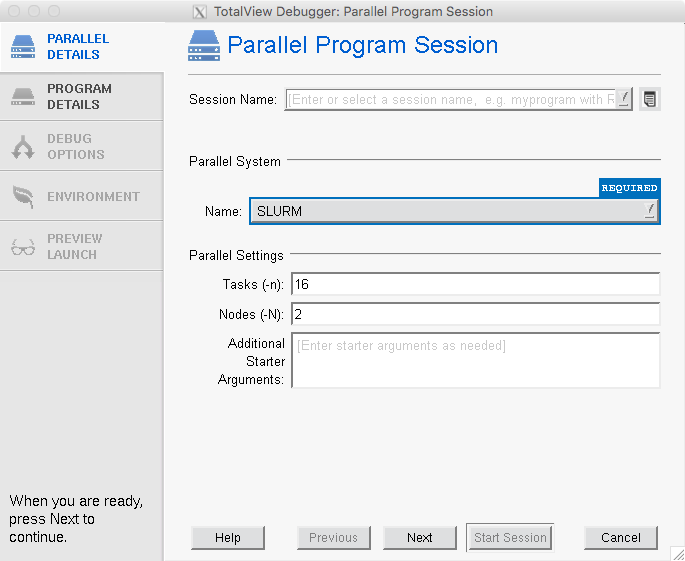
Click Next. In the next window (the PROGRAM DETAILS tab), provide the executable file name and, if any, command line arguments.
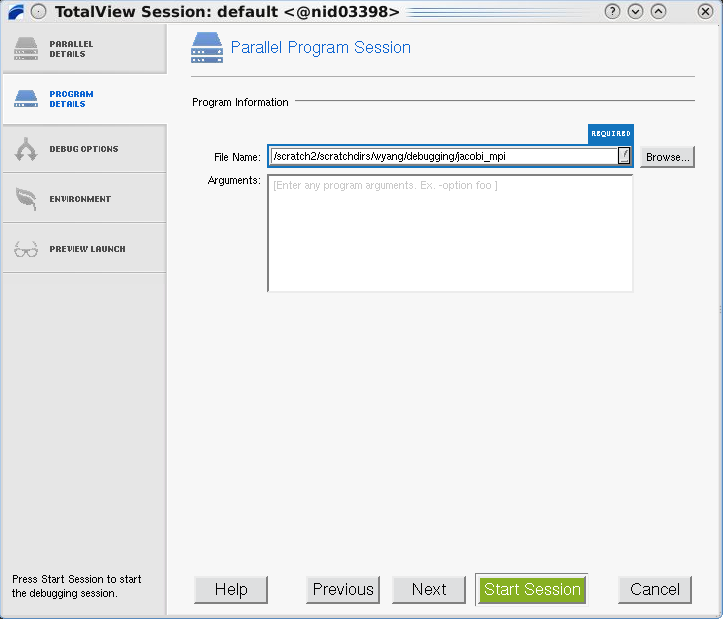
Click the 'Start Session' button.
Enabling OpenMP Debugging
OMPD is an implementation-independent API that is intended to allow tools such as debuggers to inspect the internal execution state of OpenMP programs (see Using OpenMP Debugging Interface (OMPD) With TotalView). To take advantage of OMPD in displaying the state by TotalView, you need to define the following environment before starting an OpenMP app with TotalView:
export OMP_DEBUG=enabled