ERCAP and Iris Guide for DOE Allocation Managers
ERCAP Reviewing, Approving, and Awarding
Accessing the ERCAP Requests
When a PI submits an ERCAP request to NERSC it is directly assigned to the DOE SC Program selected by the PI in the request. The DOE Allocation managers will be notified via email every Monday morning about the ERCAP requests that have been submitted for review. The email will look similar to this:
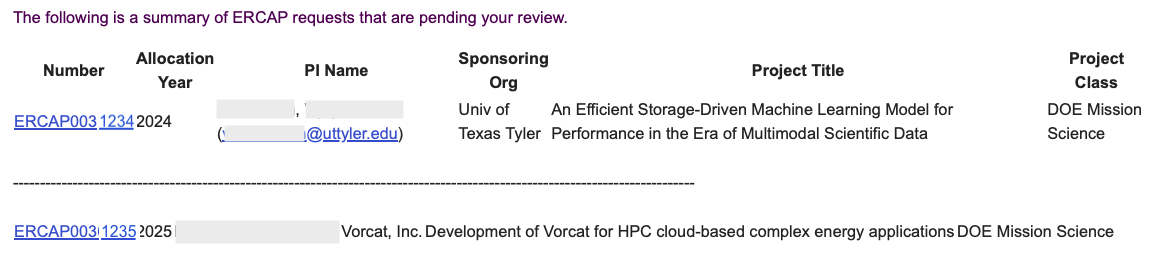
The email will contain the ERCAP request Number, the Allocation Year, the name of the PI and their Organization, the Title of the request, and the Project Class. The ERCAP Request number will be a link that will take you to the NERSC ERCAP system to review the request.
You can log directly into the ERCAP system with the URL: https://ercap.nersc.gov
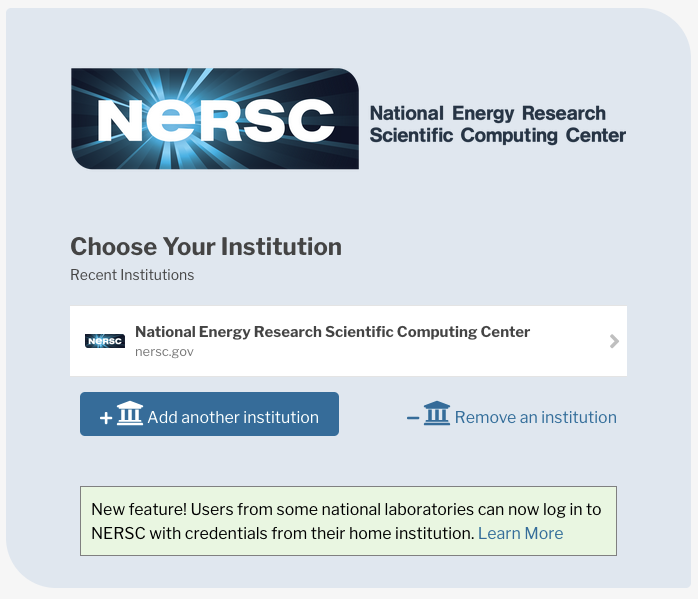
You will first be directed to our Federated Identity screen where you will be asked to Choose Your Institution. Please select NERSC as your Institution.
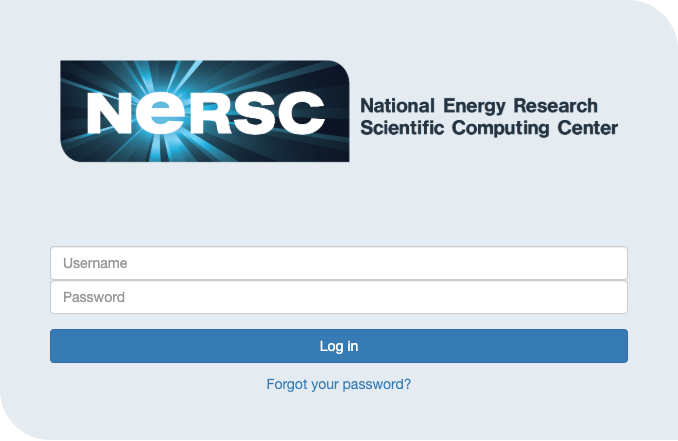
You will next be asked to enter your NERSC username and password.
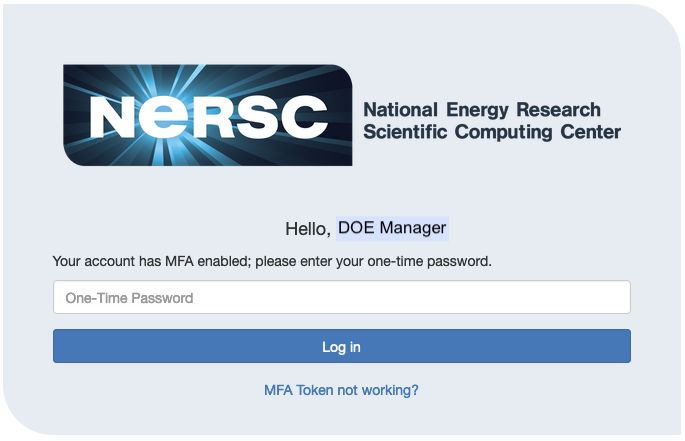
Finally, you will need to enter your Multi-Factor Authentication (MFA) One-Time Password (OTP).
You can find all of the requests assigned to you waiting to be reviewed by clicking on the link in the left menu column titled 'ERCAP Requests for Review.'
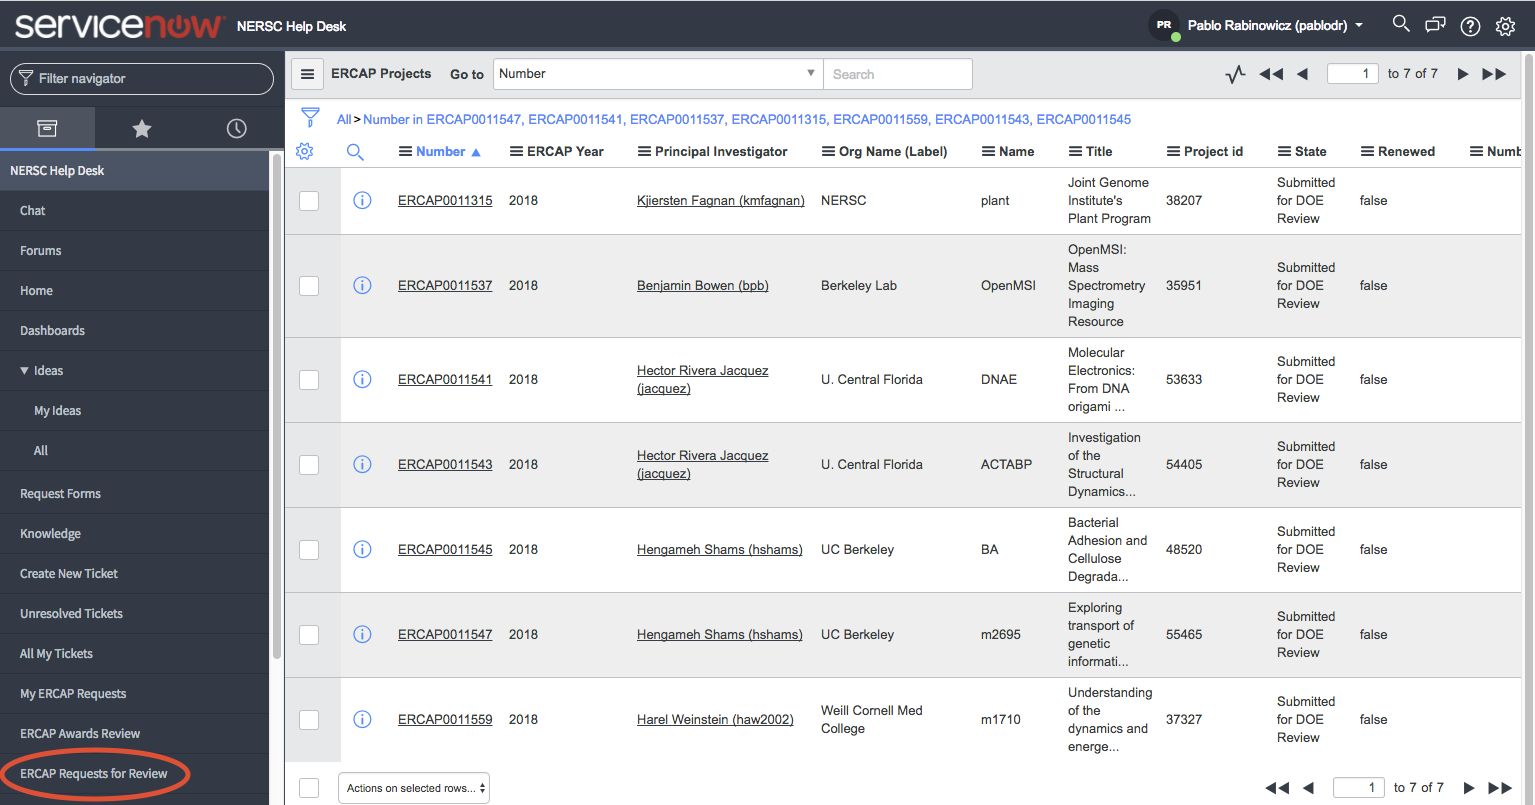
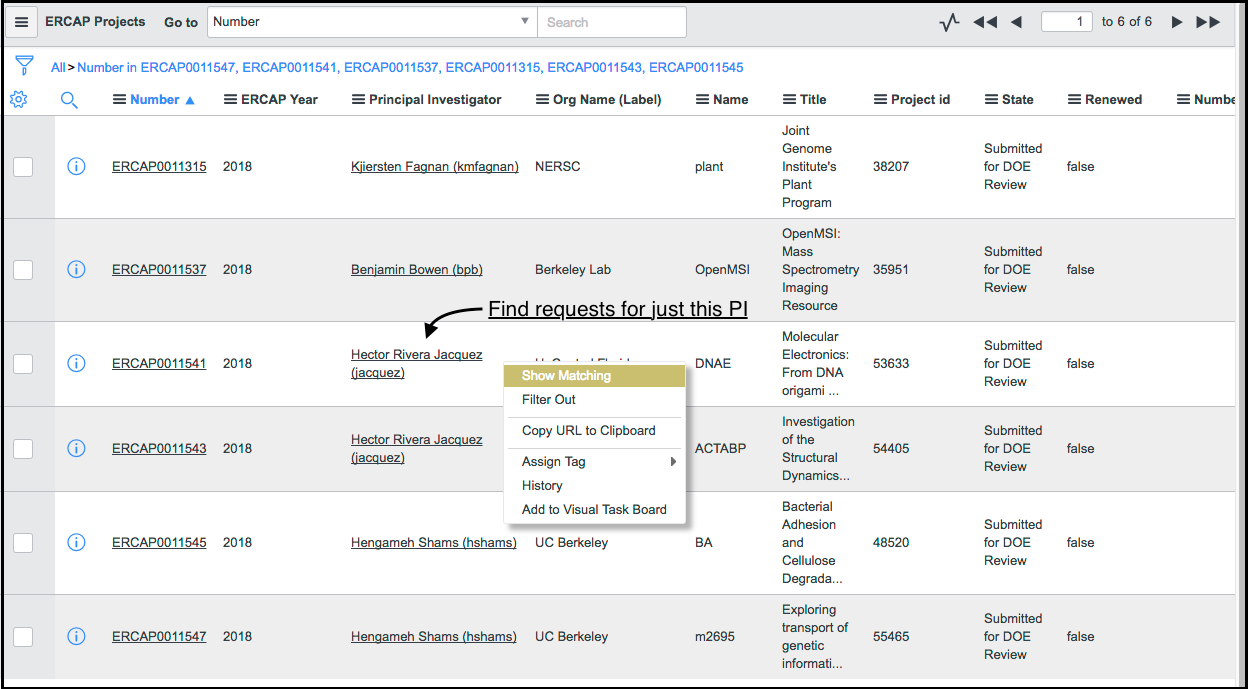
Click on the ERCAP Number to take you into the request to review, print, etc. You can also filter this list by right-clicking in the white-space next to a text in a column and select 'Show Matching' to find only the certain requests (such as Show all the requests for a particular PI)
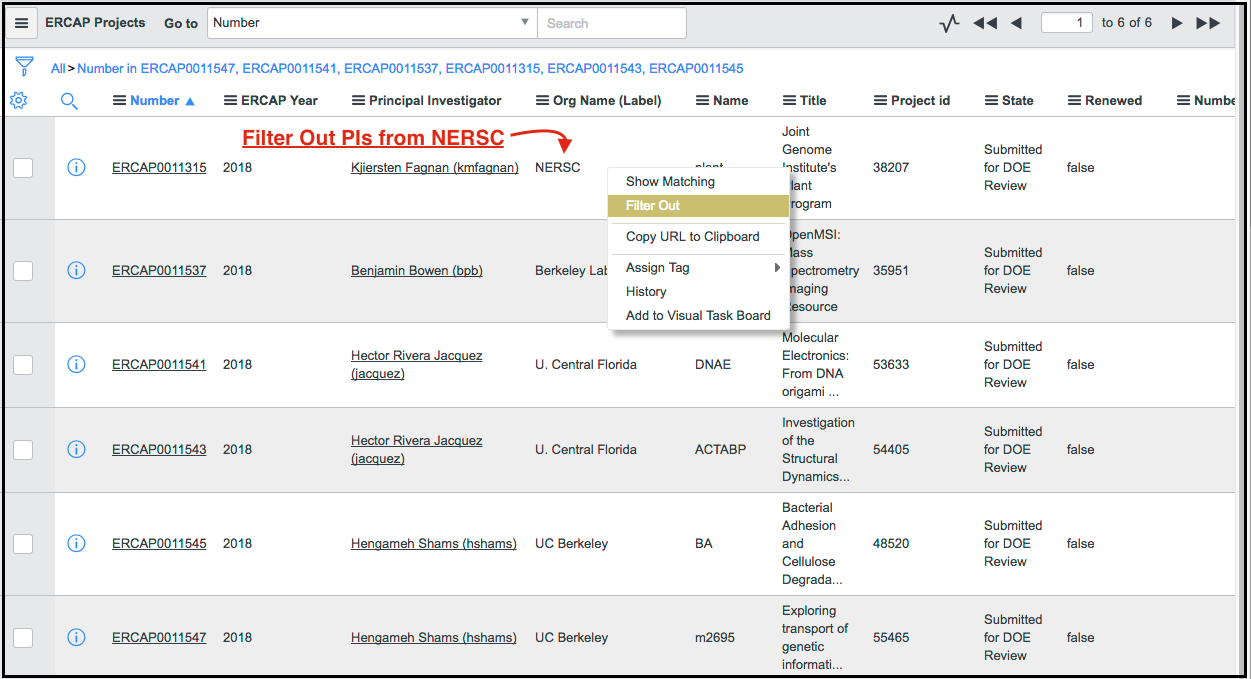
or 'Filter Out' to remove all the requests that match the criteria (such as Filter Out all PIs from NERSC).
There are three tasks that you will need to perform:
- Review the request.
- Approve or reject the request.
- Enter a computing time allocation award.
Instructions for completing each task are provided below.
(1) Review the request
-
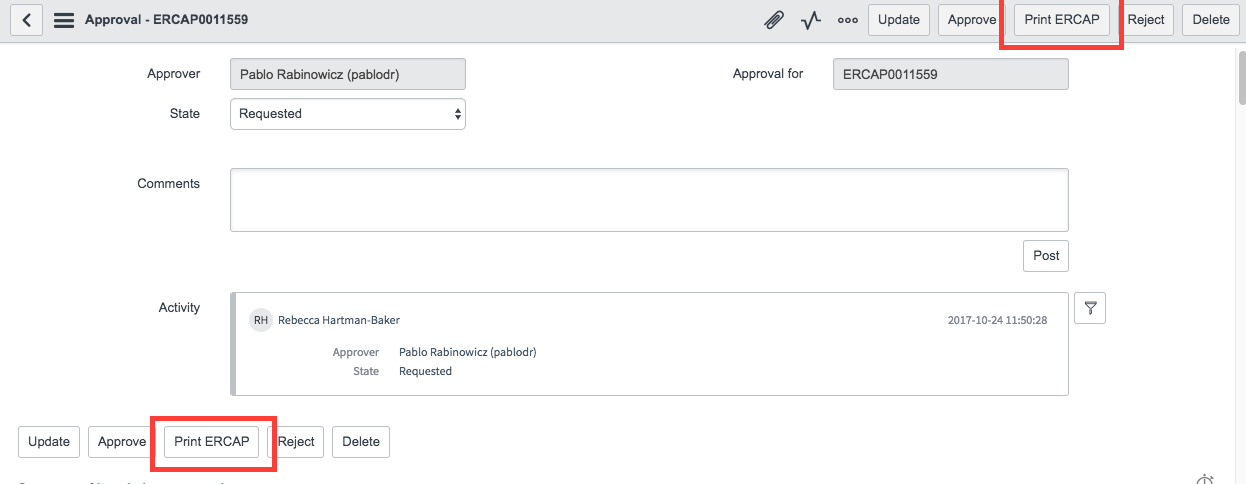
You can scroll down the page to review the request online in your browser.
Or you can print a PDF copy of the request by clicking on the 'Print ERCAP' button at the top right and lower left of the page. (Printing works best from a Chrome browser.)
-
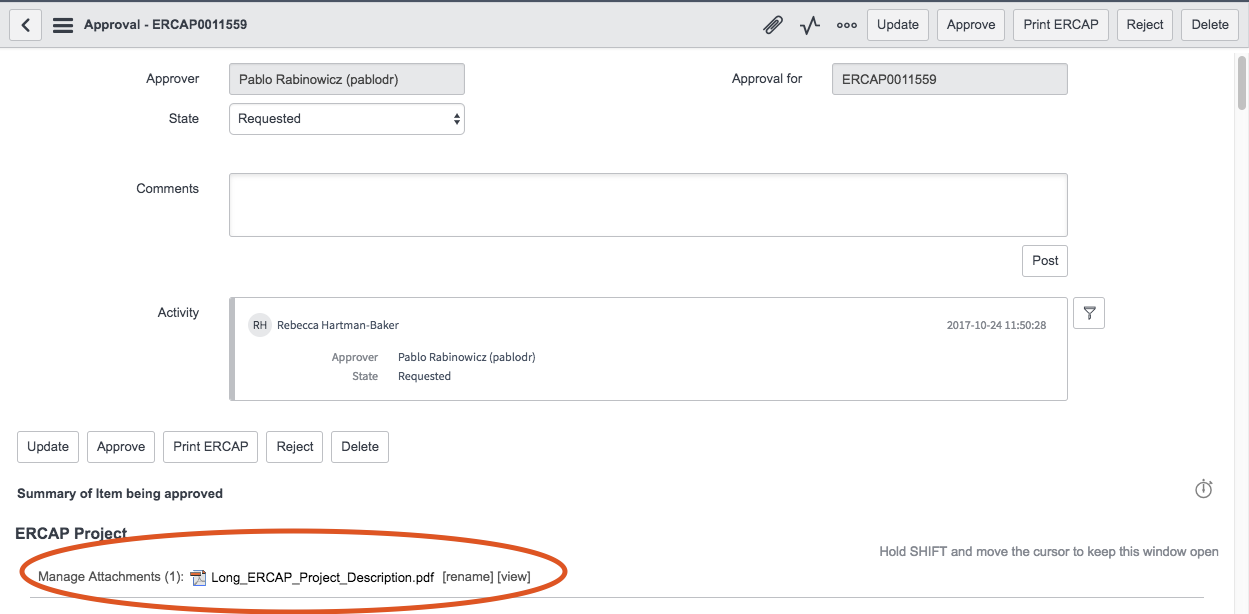
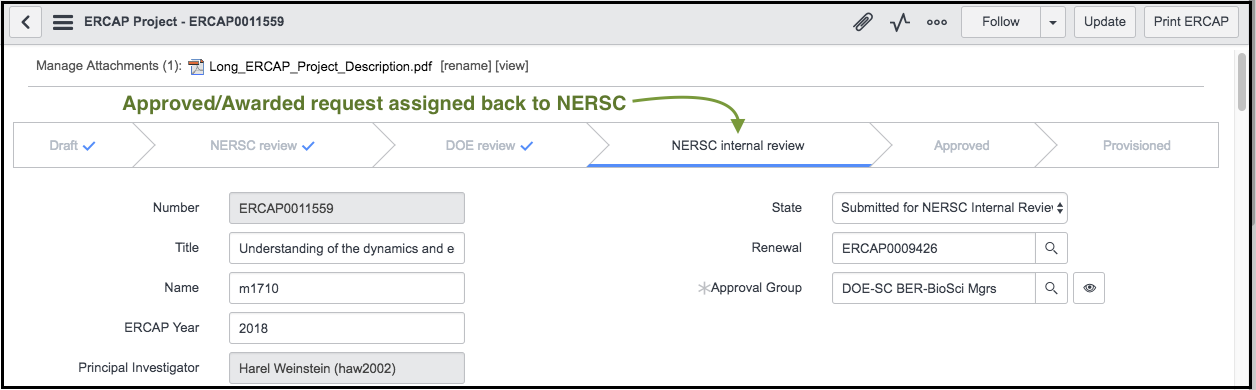
If there are any Attachments to the request, you will see them just above the Status bar. They will not be printed with the request, so you will need to download and print them separately.
-
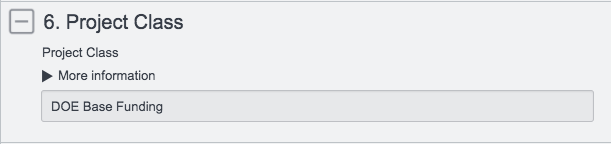
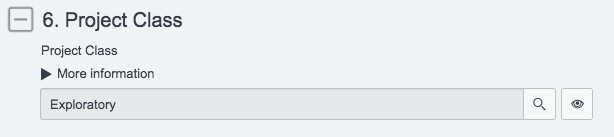
When you are reviewing a request, please be sure to note the 'Project Class' at # 6. If this is a Startup/Exploratory request, you will still need to make the allocation award entry, but the time will come from NERSC's allocation reserve and not yours.
(2) Approve or Reject the Request
-
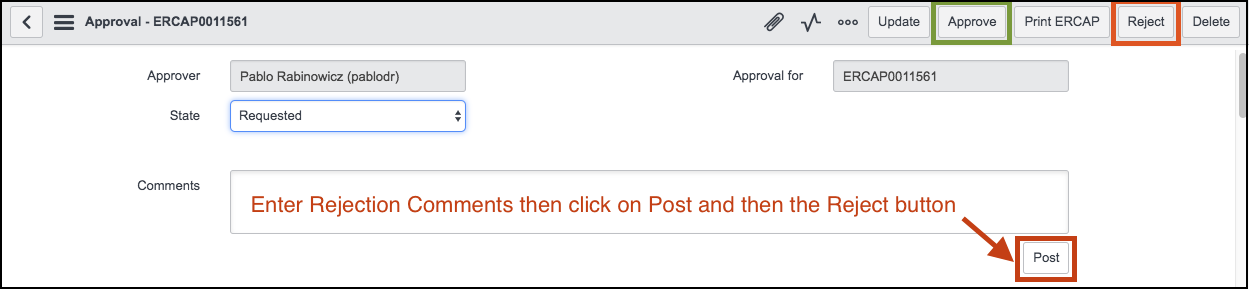
You can click on the 'Approve' or 'Reject' button at the top right of the page. When you reject a request, type your reason for rejecting the request in the 'Comments' box and they will be sent to the PI with the rejection notification.
-
If you select a request from the 'ERCAP Requests for Review' list, you can Approve/Reject it from the Approval tab at the bottom of the page.
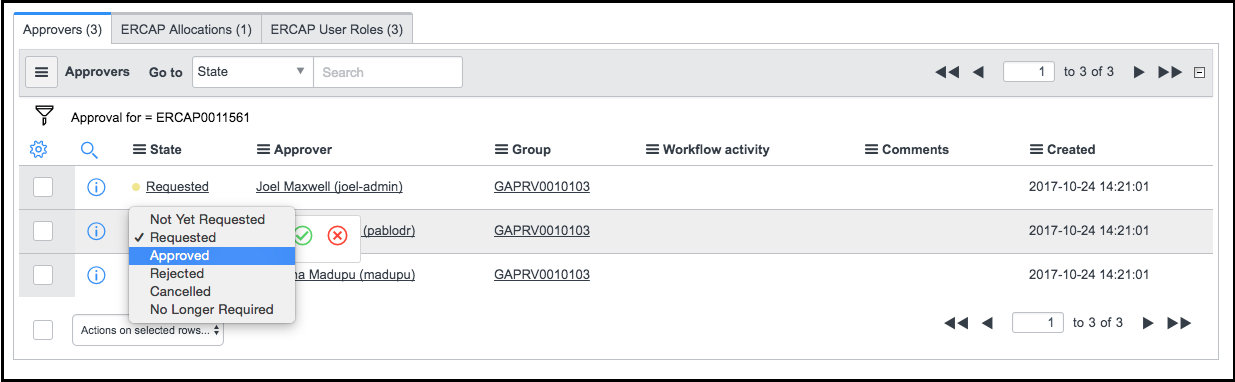
(3) Enter a Computing time allocation award.
Enter an award for a single request
-
To enter an allocation award for a single ERCAP request, you will need to click on the 'ERCAP Requests for Review' link and select the request from the list by clicking on the request number link.
-
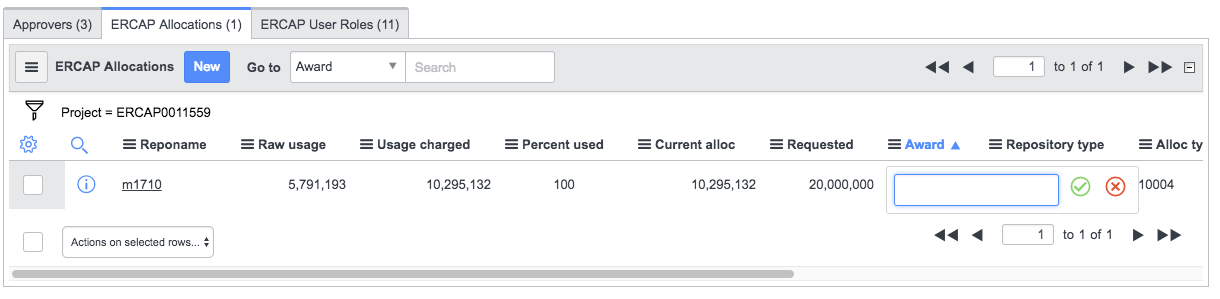
Scroll down to the bottom of the page and click on the 'Allocations' tab. You may need to scroll over to the right until you find the 'Award' column.
-
Double-click on the space in the Award column and it will turn into an edit box. Enter the number of hours you want to award this project. Then click on the green 'Check mark' or press the Enter key to save your award entry.
Entering awards for multiple requests
-
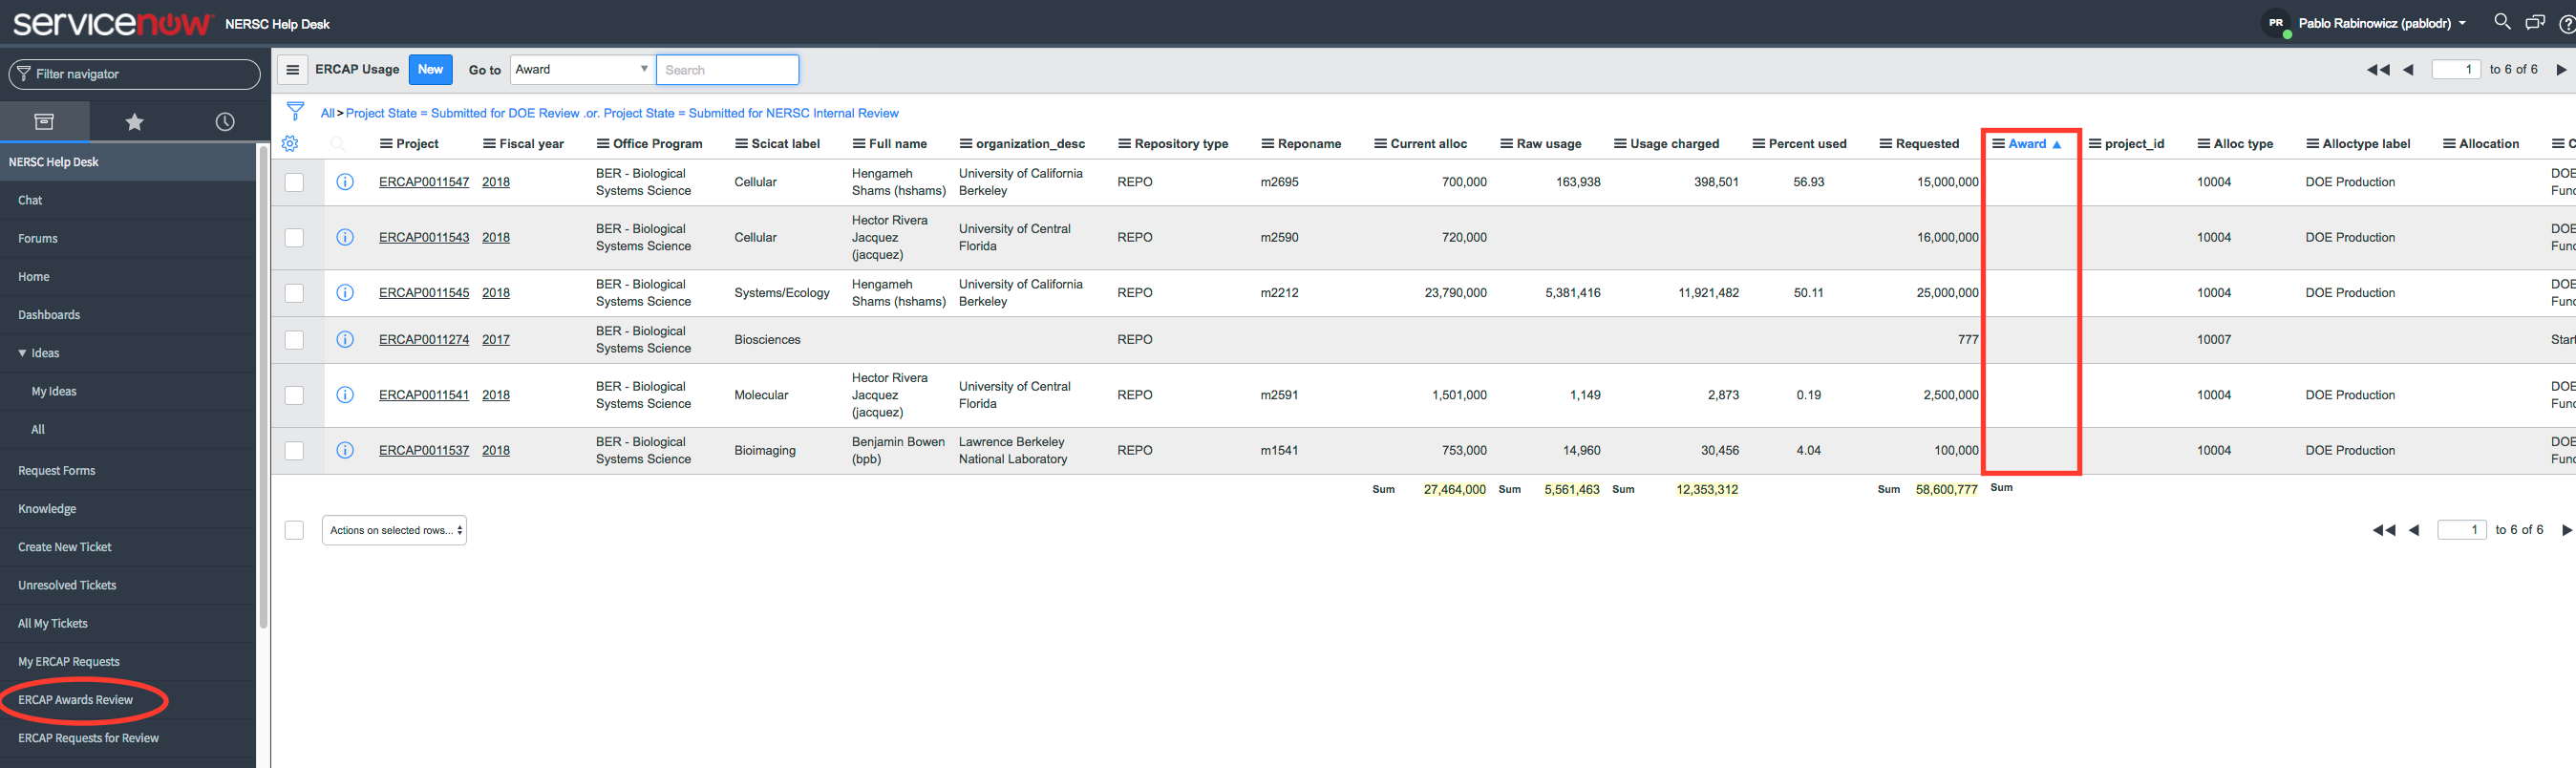
You can enter allocation awards for multiple requests at once by clicking on the 'ERCAP Awards Review' link.
-
You can view and make awards for all of your projects by clicking on a blank cell in the Award column and entering the award amount in hours, then click on the green 'Check mark' or press the Enter key to save the award (same as above). You will need to make an entry for each repo.
-
If a row does not have a reponame or usage data, then it is most likely a new request for a new project.
-
When you enter awards in this way, the amount of time that you award will be summed up at the bottom of the Award column. This sum is only for the requests that you are working with at that time.
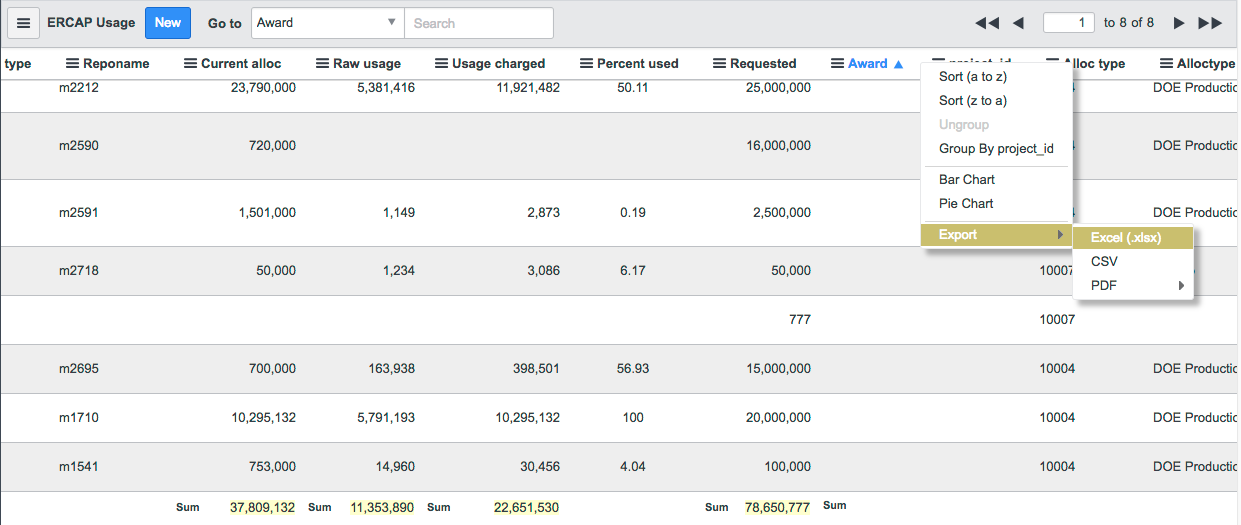
Exporting Usage and Award data
From this list, you can export all of the project usage and hours requested data to put them in a spreadsheet for your own analysis. Right-click on any white-space in the header bar and select Export and then the format that you want to export to.
After you have completed these steps, the request will automatically be assigned back to NERSC for final approval and provisioning.
Using Iris, NERSC's Identity and Access Management Tool
Navigating Around Iris
This section is to provide quick information on the top level Iris menus only. More detailed information on how to navigate or use various utilities in Iris can be found in the Iris Guide for Users.
Menu Bar
The menu bar at the top of the page has several menus, allowing you to access different parts of Iris.

-
The Iris icon in the top left corner is clickable and serves as the Home button. When clicked, it brings you back to the "Homepage" which displays the current usage of the projects under your Office and Program.
-
The Projects pull-down lists the projects that the logged-in user has access to and allows the user to see usage info for each. For allocation managers, the pull-down list will be normally empty.
-
The Reports pull-down provides various usage report options.
-
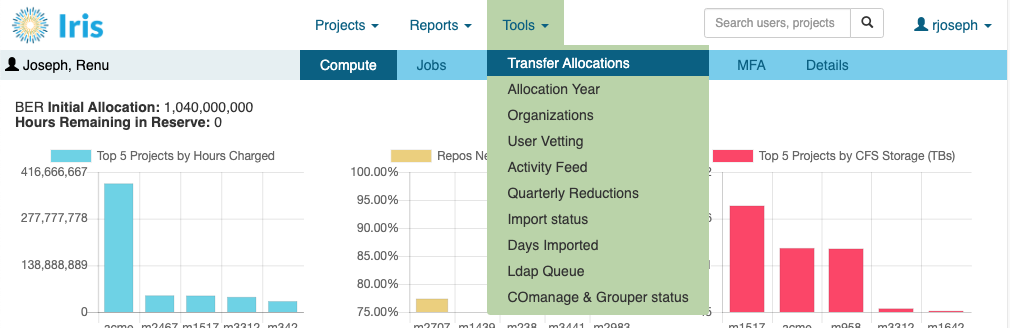
The Tools pull-down provides tools for transferring allocations, viewing info for user organizations, etc.
-
The search box allows you to quickly get the information you need about individual users or projects.
-
The account pull-down under your account name in the top right corner contains menu for displaying what your Iris roles are (e.g., User, PI, DOE Admin, ...) and what permissions you have in Iris. Someone in a project group whose role is the PI, a PI proxy or a Project Resource Manager can edit in Iris how much compute time a user in the group is allowed to use.
To logout from Iris, select the Logout menu item.
For certain menu items, there is also a sub menu bar under the top menu bar, consisting of tabs for different menu items. When this bar appears, the first value on the left refers to the context for the page displayed. For example, if the sub menu is about your account itself (that is, when the Iris icon is selected), the label will be your full name, as shown in the above figure. If the sub menu is about an allocation account, it will display the allocation account name.
These menu bars are always available to you, and do not scroll when you scroll down the screen.
Sorting the Display Data
Displayed data can be sorted by a column by clicking on the column heading. By default data is sorted in the ascending order. Clicking on the heading again, you can toggle the sorting order.
The column selected for data sorting has its column heading marked as chosen.
Iris Homepage Usage Report
You can review the current usage of the projects under your Office and Program through the Iris website, https://iris.nersc.gov.
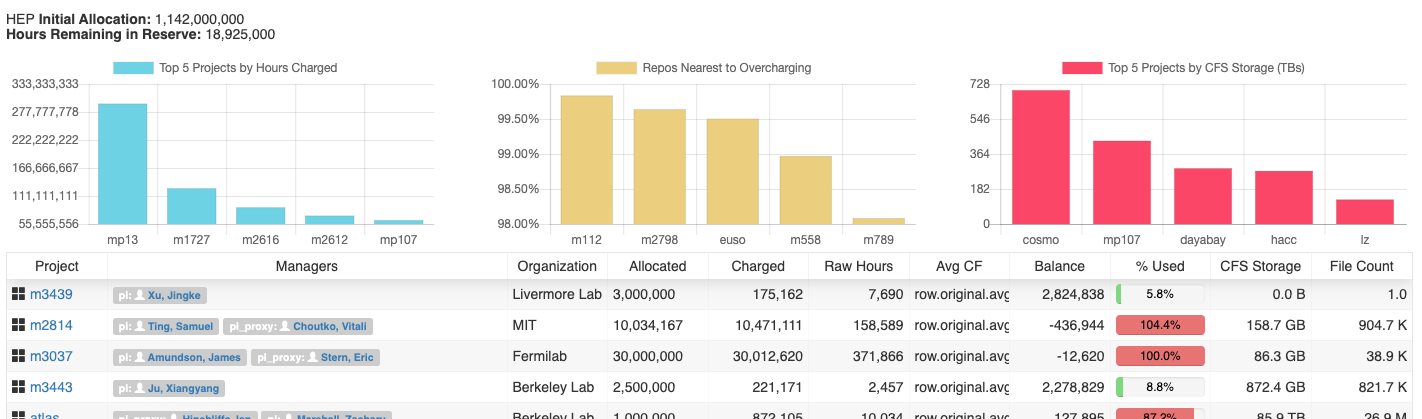
When you first log in to Iris, you should see a display of all the projects assigned to your Office/Program and their current allocations and usage. The list is sorted by project name in the ascending order. You can re-sort the list by clicking on a column header. You can toggle the sorting order by clicking on the header again. You should see a bar chart of the top 5 usage repos. You can also see the top 5 repos nearest to overcharging their allocation and the top 5 repos by CFS (Community File System) storage. If you have any time left in your Reserve, you will see a line that shows your remaining balance in the top left corner of the page.
Finding Project/Repo Information
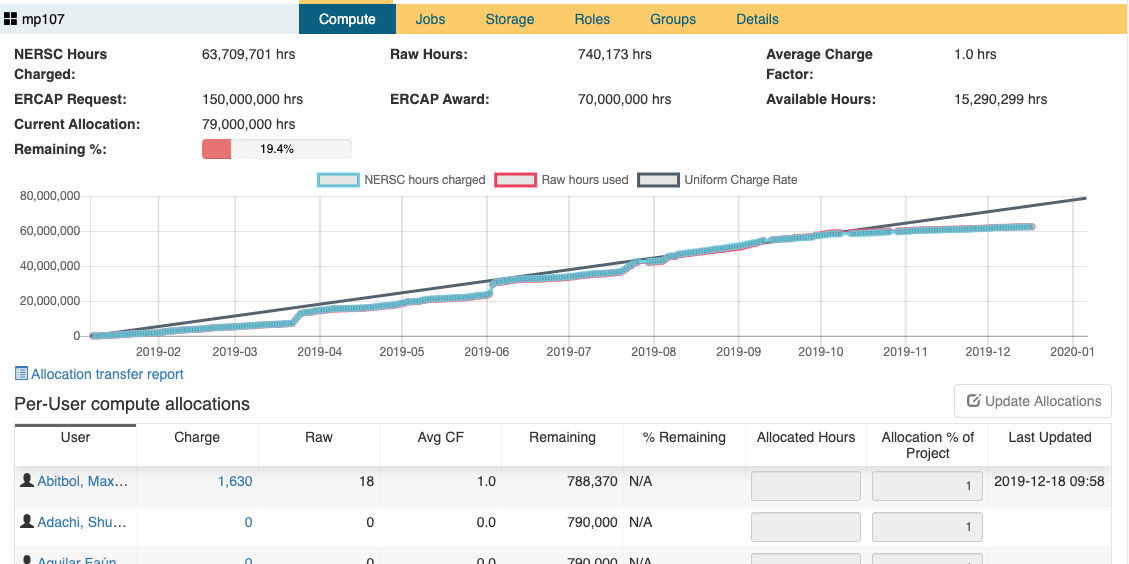
You can find basic information about a project by clicking on the project name link under the Project column in the usage report. Iris will show the compute usage info page for the project (that is, the 'Compute' tab is chosen).
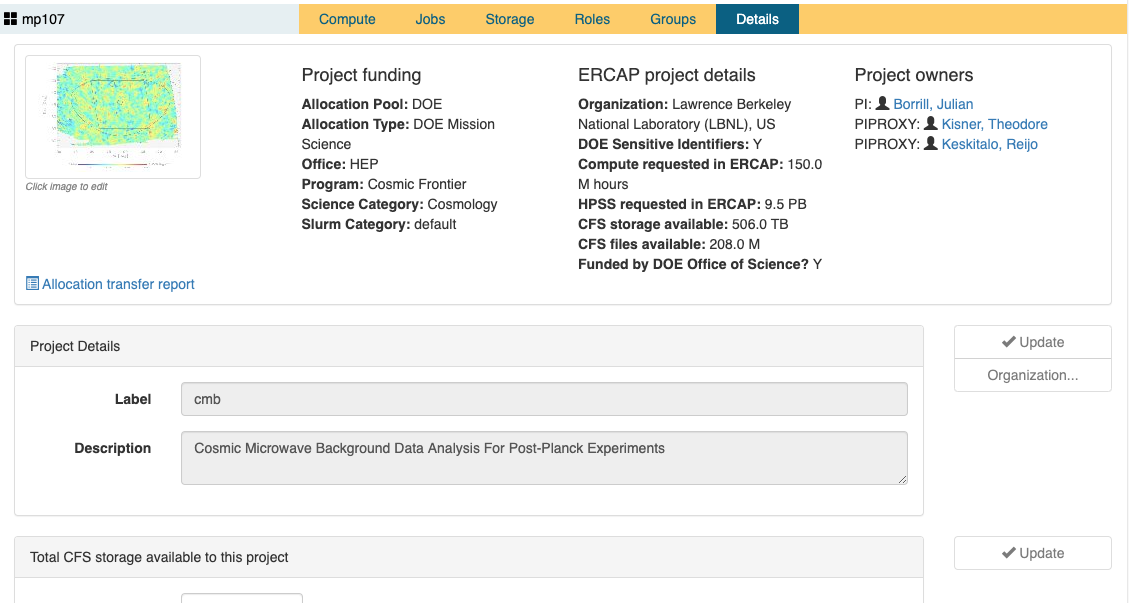
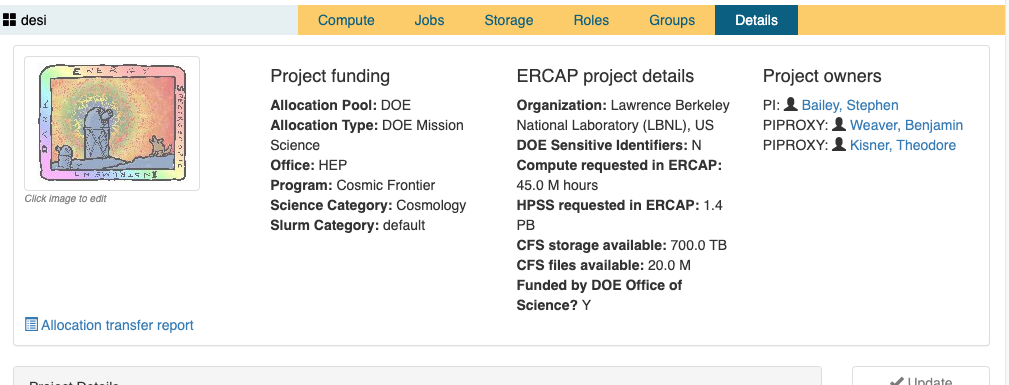
Or if you know the project name, you can do a search by typing the name in the search box near the top right corner of the page. In this case, Iris will show the 'Details' page of the project. This page gives you additional information about the project such as the DOE Office and Program, the Science Category, if it has DOE Office of Science funding, the Requested hours, etc.
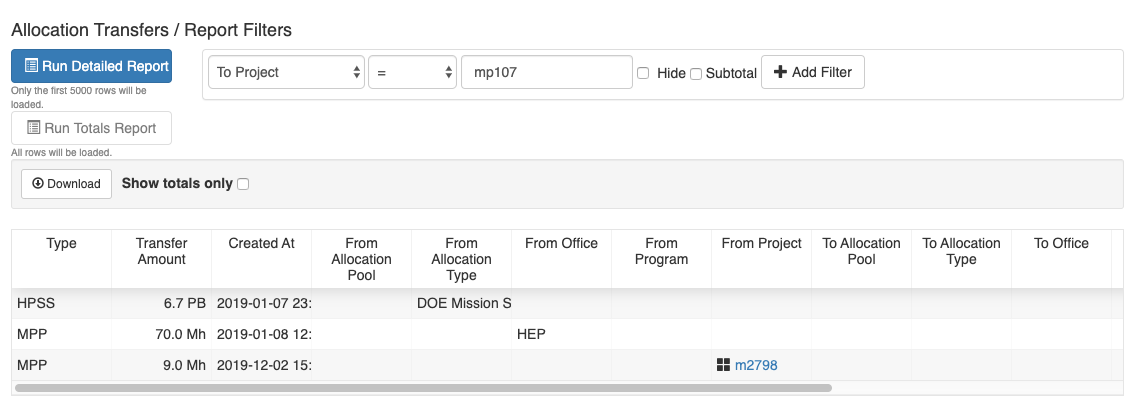
You can also view the allocation transfer history for the project by clicking on the 'Allocation transfer report' link provided on both pages.
Finding a Project Starting with a Person
If you have a person's name but don't have the project name or don't know if the person is a PI or if they already have a NERSC project, you can track down which project they are in by starting with a search. In the search box near the top right corner, enter the person's name. You will see a list of NERSC users whose name contains the search word.
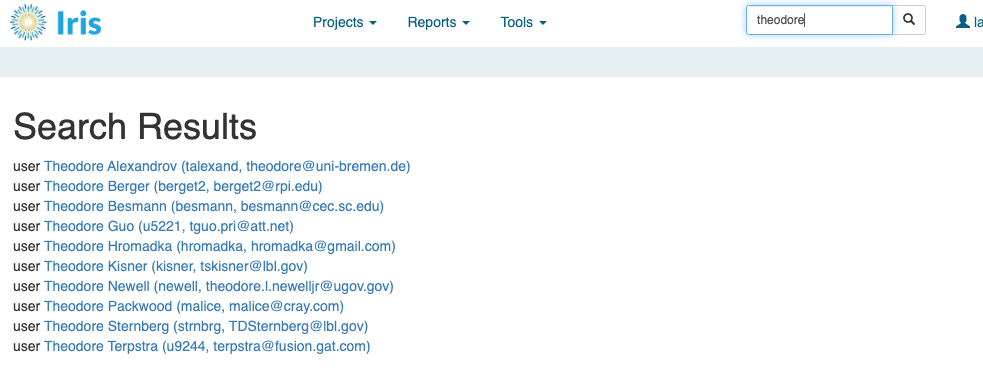
Click on the name to go to the user's contact information page (that is, the 'Details' tab).

On the menu bar next to the 'Details' tab is the 'Roles' tab. Click on this tab to see what projects this person belongs to.
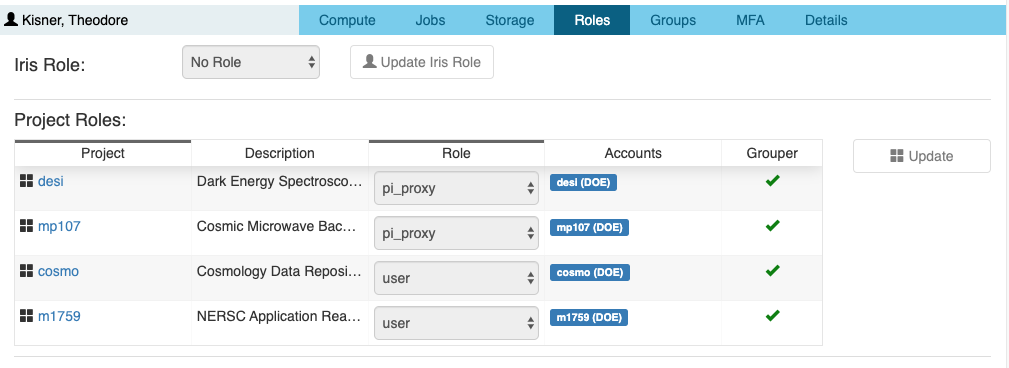
Click on the project link, and Iris will display the project's 'Compute' usage page. Select the 'Details' tab to see details about the project.
Usage Reports
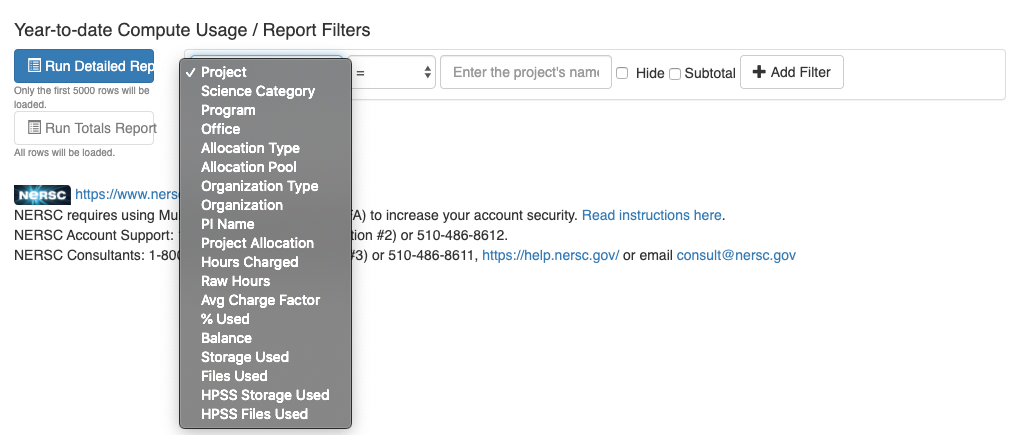
You can easily generate compute and storage usage reports for allocation accounts with the many report generation options in the 'Reports' pull-down menu on the top menu bar. For example, you can generate compute usage for a certain date or a month, for an allocation account or a group of accounts. You can filter your search with various categories (start time, end time, submit time, user, project, etc.). You can also examine batch jobs run on NERSC hosts.

You can run reports for a specific PI, Office or Program, by selecting the appropriate filter field (in this case, 'Project', 'PI Name', 'Office', and 'Program', respectively).
More detailed information on how to generate various reports, please check the 'Reports menus' section in the Iris Guide for Users.
Transferring Time
Go to the 'Tools' menu on the top menu bar, and select 'Transfer Allocations'. menu option.
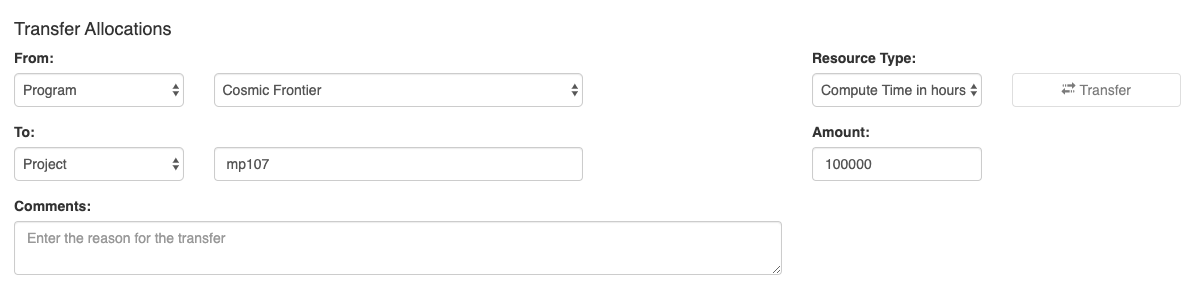
The top section of the displayed page is for making a resource transfer transaction. To transfer a resource, follow the steps below.
-
In the 'From' section, select the appropriate reserve type among 'Allocation Pool', 'Allocation Type', 'Office', 'Program' and 'Project'.
-
In the box next to it, select the appropriate reserve that you want to transfer from (e.g., 'Cosmic Frontier').
-
In the 'To' section, make sure to select 'Project' and enter the project name in the text box (e.g., mp107).
-
In the 'Resource Type' section, select the resource type: 'Compute Time in hours' or 'Storage Space in TBs.'
-
Enter the amount in the 'Amount' field that you wish to transfer.
-
Click the 'Transfer' button.
In the 'Reserve' section below, a table lists compute and storage reserves for all the reserve types. There you can easily view detailed info about reserves for your Office and Program.
