Multi-Factor Authentication (MFA)
Introduction
NERSC users are required to use Multi-Factor Authentication (MFA) for logging into NERSC resources. MFA provides greater protection than regular passwords against phishing and other modern threats to your digital security. With NERSC's MFA, you authenticate using your NERSC password plus a "one-time password" (OTP). As the name implies, you can use an OTP only once.
How NERSC MFA Works
MFA at NERSC makes use of an app that you install on your mobile device, which you configure through Iris (If you do not have an iOS or Android mobile device, see below for alternatives). The authenticator presents a 6-digit password that changes every 30 seconds. Each password can be used only one time, thus the name "one time password" or "OTP." When you log in to an MFA-enabled system, you will enter your NERSC password followed by the OTP displayed on your authenticator app.
Configuring and Using an MFA Token
The one-time password entry in the authenticator app is sometimes called a "token," or more specifically, a "soft token." To use MFA, you create a token for NERSC and install it on the authenticator app.
The four basic steps for configuring your NERSC token are:
flowchart LR
  first[Install the authenticator app]
  second[Enable MFA in your Iris account]
  third[Generate a NERSC OTP token via Iris]
  fourth[Install the token on the authenticator app]
  first --> second --> third --> fourth
Installing the Authenticator App
NERSC primarily supports the Google Authenticator app, which runs on an Android or iOS device. Other TOTP (Time-based OTP) authenticator apps can work, too - you can search for "TOTP" to find other options.
If you do not have such a device, NERSC also supports and provides instructions for desktop tools, a desktop app for Mac, Windows and Linux computers.
You can download Google Authenticator for Android on the Google Play Store; or Google Authenticator for Apple on the Apple Store.
Please note that you do not need to have a cell phone signal or WiFi to use Google Authenticator since OTPs are generated using the internal clock in your device. Once configured, you can use the app without any phone or internet service.
Creating and Installing a Token
In this step you will "connect" the app on your mobile device to your Iris account. You first create a token in Iris, and then install it on your app.
Login to your Iris account using your login ID, NERSC password and OTP at https://iris.nersc.gov. The login page looks as shown below:
After you login, click the 'MFA' tab:
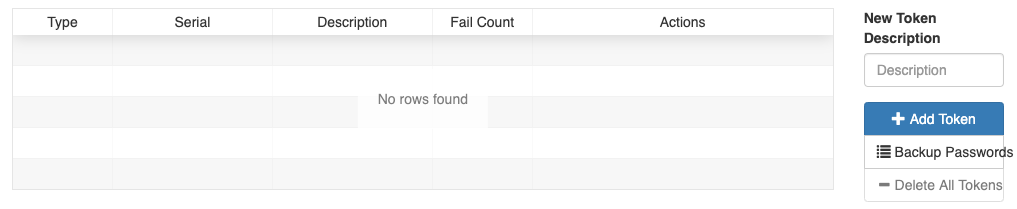
To add a new token, first add a descriptive text in the 'Description' box.
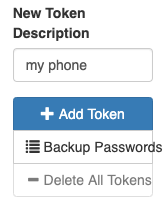
In the above example ("my phone"), the user is trying to generate a token that will be used with the Google Authenticator on a phone. If you have more than one token from different devices, you can add a proper description for each token for your reference.
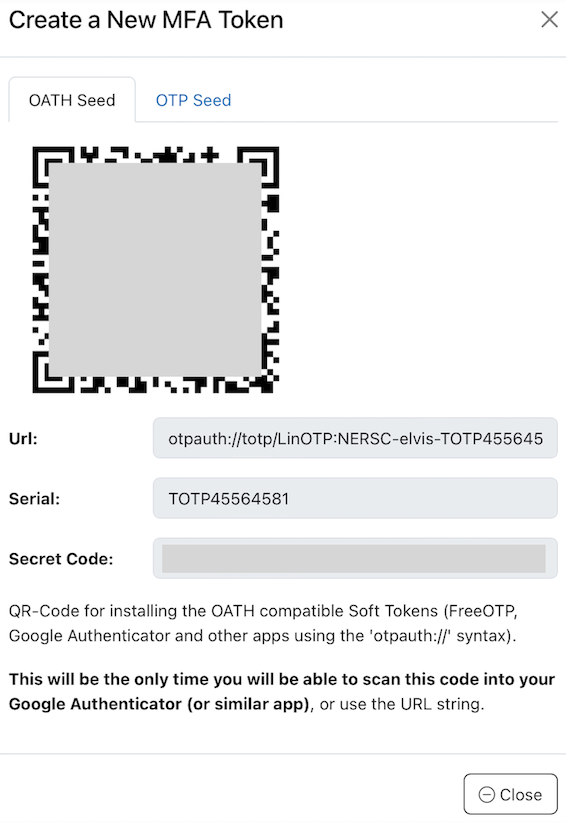
Click the '+ Add Token' button. Then, the webpage will display a token and a QR code that is to be scanned into your device. Note the token ID (e.g., TOTP45564581).
Using Google Authenticator
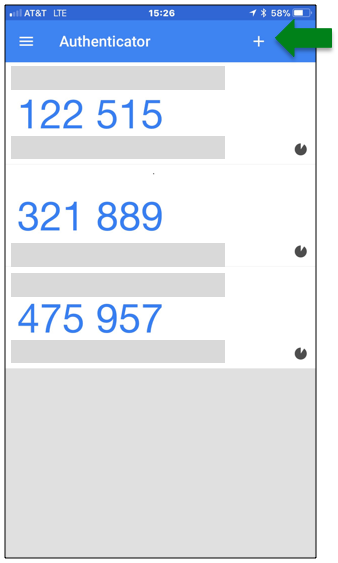
If you use Google Authenticator, start up the app on your device and click the '+' button on the bottom right (in case of an Android device), then 'Scan a barcode'.

On Apple devices, look for the '+' sign at the top right of the app:
If necessary, allow the app to access your camera, and point the camera at the QR code.
If you prefer not to scan the QR code with your device's camera, select 'Enter a setup key' and enter the 'secret' field value shown in the MFA token in the 'Your key' field excluding the hyphens. For the 'Code name' field, you can use the TOTP number shown in the MFA token (e.g., TOTP18941BFC). Then, select 'Time based' in the 'Type of key' field.
After either scanning the QR code or entering the secret code manually, it should register automatically and then show the new token in your list. Your mobile device is now connected to your Iris account for MFA logins.
When you add the token on your device, the token name, in the form of NERSC-_nersc_login_id-token_id_ (NERSC-elvis-TOTP18941BFC in the above example), appears in the far left side under the token list on your device.
Using Desktop Tools
There are several apps with the TOTP functionality that all work on Mac, Windows and Linux desktop/laptop computers. Below is a selected list. Many are password managers that can generate OTPs for accounts associated with the stored passwords.
| Name | App type | Free? |
|---|---|---|
| KeePassXC | Password manager | Yes |
| Bitwarden | Password manager | TOTP functionality only for paid users |
| 1Password | Password manager | No |
| Keeper | Password manager | No |
| Yubico Authenticator | Authenticator | Need to buy a hardware token, Yubikey |
For KeePassXC, please use the NIST approved AES256 algorithm for encrypting their keystore (in 'Advanced Settings' for 'Encryption Settings').
Some tools such as KeePassXC don't accept dashes in a secret code. If Iris displays 'A2B3-C4D5-...', for example, you need to enter 'A2B3C4D5...'.
Many password managers, including those listed above, are also available as web browser extensions. Others are provided as browser extensions only. There are other TOTP authenticator browser extensions that may work, too.
macOS (Monterey or newer) has a built-in TOTP functionality for password items stored in iCloud Keychain. If you decide to use the capability, below is what to do:
- Make sure to turn on iCloud Keychain on your Mac, following the Setup iCloud Keychain directions.
- In macOS 14 (Sonoma) or earlier, choose 'Apple menu > System Settings...' from the top menu bar, and click 'Passwords' from the side bar menu. In macOS 15 (Sequoia), open the Passwords app.
- Unlock with your Mac password. The listed password items are those in iCloud Keychain.
- If your NERSC password item is not there, create one first, by clicking '+' and selecting 'New Password'.
- Select the password item in question and click 'Edit'.
- Enter the secret code of a MFA token in the 'Verification Code' field.
An OTP is then displayed in the Verification Code field. You can use a different Apple device with the same Apple ID as it will show the identical OTP. As a bonus, when connecting to the website for a password item in the Keychain, Safari autofills the password and OTP fields for you.
Please compare the options above and other tools not mentioned, and use the one that best suits the needs in your working environment. If none of the above work, please reach out to NERSC support for help.
Testing Your New Token
To test if the new token is set correctly, click on the 'Test' button for the token in Iris, and you will see the following:
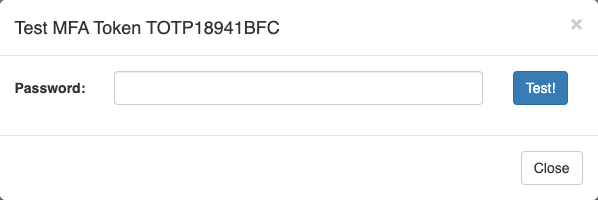
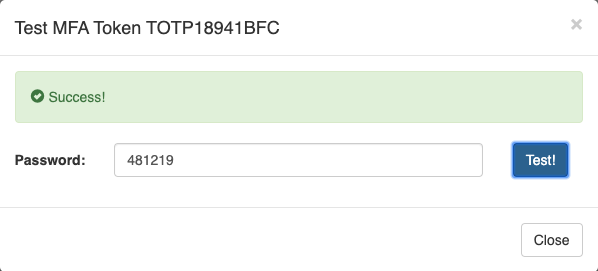
Enter the one time password generated on your authenticator app in the 'Password' field (do not enter your NERSC password). Then, click on the 'Test!' button. If everything is successfully configured, the Iris page will show 'Success':
Multiple Tokens
If you have more than one mobile device, you can create a token for each one. For example, you can have one for each phone and also for a tablet, as shown below:
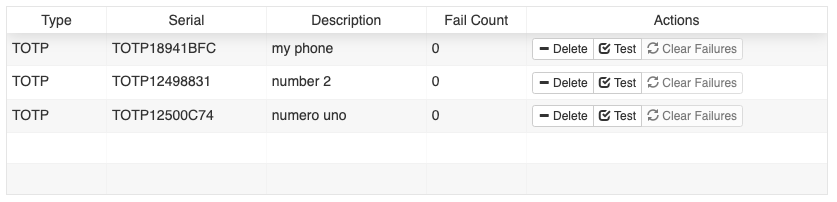
You can have up to 4 tokens.
When you log in to NERSC resources, you can use any token for authentication, and do not have to specify which one you will use – the server will match your one-time password against all of the tokens that you have created.
Checking and Managing Tokens
You can view all the tokens you have created from the 'MFA' tab in Iris (see the picture above).
Deleting a Token
If you don't need a particular token any more, you can delete it. Select the token in Iris that you want to remove and press the '- Delete' button.
Backup OTPs
If you lose your device or don't have it with you, you cannot log in. Backup passwords are a small set of one-time passwords that you can use if you don't have your mobile device on-hand.
Click the 'Backup Passwords' button to generate backup OTPs:
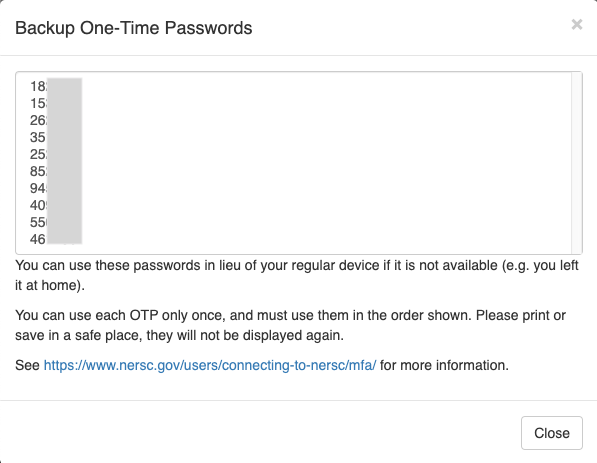
Please print or store these passwords in a document and keep in a safe place. When you need one, you simply enter the first unused password on the list and then scratch it out. Next time you need a backup password, you enter the next password on the list, and so on. You must use the passwords in the order given to you by Iris.
Note that if you generate a new set of backup OTPs, any unused ones generated previously become invalid.
If You Lost Your Tokens
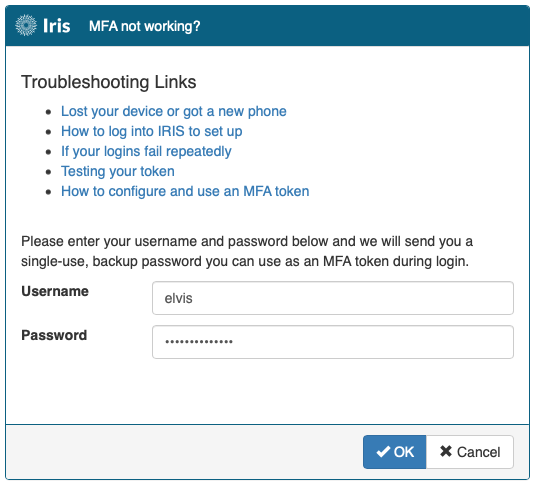
If your MFA tokens are lost permanently (for example, you replaced your mobile device) or if you are a first-time user and didn't complete the MFA token configuration process before logging out of Iris, you can request a one-time password that can be used for you to log in to Iris for setting up an MFA token. Please follow the steps below.
-
Click the 'MFA not working?' link on the Iris login page.
-
Enter your username and password. Click OK.
-
A dialog box shows up and asks if you want to create a MFA token. Click OK.

-
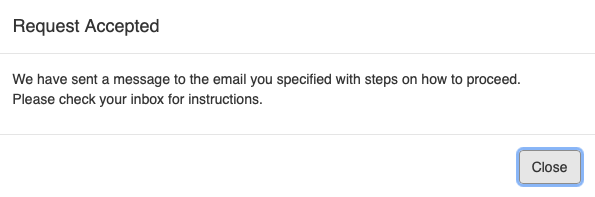
A new dialog box will show up.
-
If you have entered the correct password, NERSC will send an email. The email contains a single-use OTP.
-
Use it to log in to Iris. Create and install a new MFA token. If your previous MFA tokens are lost forever, make sure to delete them all.
Using MFA with SSH
The simplest way to use MFA with ssh is to ssh to a NERSC system. When you login with ssh to a NERSC machine, you will be prompted to enter 'Password + OTP':
$ ssh perlmutter.nersc.gov
 *****************************************************************
 *                                                               *
 *                      NOTICE TO USERS                          *
 *                      ---------------                          *
...
Password + OTP:
Open your authenticator app and read the OTP code corresponding to the token generated for your device:
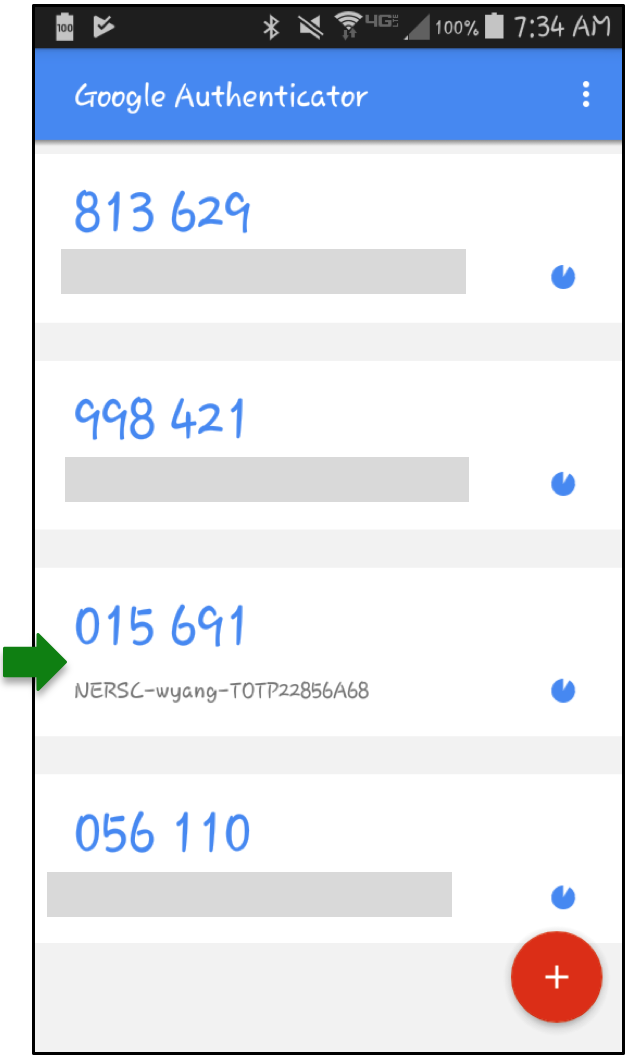
Enter your NERSC password immediately followed by the OTP, all in one line at the "Password + OTP: " prompt. For example, if your NERSC password is iL0ve_Burrit0$ and your app shows 015 691, as displayed in the screenshot, you must type iL0ve_Burrit0$015691. (Don't type the space shown in the app).
sshproxy
NERSC has developed a service, called sshproxy, that allows you to use MFA to get an SSH key that is valid for a limited time (24 hours by default). sshproxy provides a type of single-sign-on capability for SSH to NERSC systems. Once you have obtained a key, you can use it to connect to NERSC systems via SSH without further authentication until the key expires.
The sshproxy service uses a RESTful API for requesting keys. NERSC provides an executable that you can use from the command line on a Unix-like computer.
Installing the Client
You can download sshproxy executables from https://portal.nersc.gov/cfs/mfa/. The installation packages for different operating systems (OSes) and architectures are shown below. Choose the one that matches your local system.
| OS and architecture | dynamically linked | statically linked |
|---|---|---|
| Linux, x86-64 | sshproxy-<version>-linux-x86_64.tar.gz | sshproxy-<version>-linux-x86_64-musl.tar.gz |
| Linux, ARM | sshproxy-<version>-linux-aarch64.tar.gz | sshproxy-<version>-linux-aarch64-musl.tar.gz |
| macOS, Apple and Intel | sshproxy-<version>-macos-universal.pkg | |
| Windows, x86-64 and ARM | sshproxy-<version>-universal.msixbundle |
If a dynamically-linked executable doesn't work on your Linux system due to a difference in GNU C Library (glibc) versions, try the statically-linked executable which is built with musl libc.
When the macOS package is downloaded on a Mac, a popup window can appear with the message: '"sshproxy-<version>-macos-universal.pkg" can't be opened because it was not downloaded from the App Store.' This happens when your system's Security setting is to allow applications from App Store only. To check your security setting, select 'System Settings...' from the Apple menu on the menu bar, and select 'Privacy & Security'. If you get the warning message, you can click the 'Open Anyway' button for '"sshproxy-<version>-macos-universal.pkg" was blocked to protect your Mac', to suppress the warning in the future. Alternatively, you can set 'Allow applications from' to 'App Store & Known Developers'.
When installing the Windows version, a dialog window will appear asking whether to install sshproxy. Uncheck the 'Launch when ready' box as it only makes sense to run the executable on the command line.
For WSL (Windows Subsystem for Linux), install a Linux executable.
You can still get the bash shell script and the Windows executable of version 1 from the legacy directory, which don't support authentication with FedID (that is, the -f or --fedid option). You can use them if the latest version doesn't work on your system.
sshproxy on Unix-like Systems (WSL included)
Using sshproxy
Note
We assume in this section that sshproxy is installed in a directory that is included in the PATH environment variable. The macOS sshproxy installer will do this automatically by placing it in /usr/local/bin. Otherwise, you will need to invoke it with a proper path. For example, you can run the sshproxy binary from where you installed it with ./sshproxy.
The sshproxy client, without any arguments, will use your local username, and obtain an ssh key with the default lifetime (24 hours). The private and public key will have the names nersc and nersc-cert.pub, and will be stored in your ~/.ssh directory.
The script will prompt you to enter your password and OTP, in the same manner as you would do to ssh to a NERSC system with MFA:
$ sshproxy -u elvis
Password+OTP:
Enter your NERSC password immediately followed by OTP as a single string, as before. Upon successfully authenticating, the client will install an ssh key and display a message showing the path to the key pair installed on your local computer and the expiration date and time for the keys. By default, the name of the files will be ~/.ssh/nersc and ~/.ssh/nersc-cert.pub (you can change the name with a command-line argument).
$ sshproxy -u elvis
Password+OTP:
Successfully obtained ssh key /Users/elvis/.ssh/nersc
Key /Users/elvis/.ssh/nersc is valid: from 2025-01-30 12:24:00 -08:00 to 2025-01-31 12:25:52 -08:00
You can also use your home institution's login with the sshproxy tool the same way you would connect to Iris or ServiceNow. To use your institution's identity for login, use the -f flag for Federated ID:
sshproxy -f
A browser window will open, displaying the institution selection page. Use this browser window to log in. If you have recently authenticated, you may not be prompted for authentication. Once you have successfully logged in, return to your command line to verify that the SSH keys have been generated.
You will see three ssh key files (private and public keys, and a certificate containing the corresponding public key) installed in the ~/.ssh directory on your computer:
$ ls -l ~/.ssh/nersc*
-rw-------  1 elvis  elvis  3179 Aug 30 12:25 /Users/elvis/.ssh/nersc
-rw-------  1 elvis  elvis  1501 Aug 30 12:25 /Users/elvis/.ssh/nersc-cert.pub
-rw-------  1 elvis  elvis  1501 Aug 30 12:25 /Users/elvis/.ssh/nersc.pub
The above example shows that an ssh key pair has been created on your local machine. With these keys, you can ssh to NERSC machines without further authentication until these keys expire.
Checking Certificate Expiration
You can check the expiration date and time of an existing ssh key pair. If the ssh key certificate file is ~/.ssh/nersc-cert.pub, run the following command on your local computer:
$ ssh-keygen -L -f ~/.ssh/nersc-cert.pub | grep Valid
        Valid: from 2018-08-30T12:24:00 to 2018-08-31T12:25:52
Please note that the times printed are local time (your computer's time), not NERSC time (Pacific Time).
Using sshproxy Keys
You can use the keys you get from the sshproxy to log in to NERSC systems by specifying the key file on the command line. For example, to log in to perlmutter.nersc.gov with a key named nersc:
ssh -l elvis -i ~/.ssh/nersc perlmutter.nersc.gov
This will allow you to log in without having to authenticate again. The -l option allows you to pass a username other than the one on your local computer.
sshproxy Command-line Options
sshproxy has several command-line options to override its default behavior. You can run sshproxy -h to get a help message.
$ sshproxy -h
Get a NERSC keypair and certificate for password-free login for one day

Usage: sshproxy [OPTIONS]

Options:
  -u, --username <USERNAME>  The username to use
  -c, --collab <COLLAB>      The name of the collab group to use
  -s, --scope <SCOPE>        The scope to use
  -o, --out <OUT>            The name of the keyfile in ~/.ssh
  -k, --path <PATH>          The path to where the keyfiles will be stored. Defaults to $HOME/.ssh if empty
  -f, --fedid                Use fedid to log in
  -b, --no-browser           Don't open a web browser for fedid
  -p, --putty                Get keys in PuTTY compatible (ppk) format
  -a, --agent                Add key to ssh-agent (with expiration)
  -x, --proxy <PROXY>        Use socks proxy to connect to sshproxy server (format: <protocol>://<host>[:port])
  -t, --key-type <KEY_TYPE>  Specify the key type (no default, valid values are: rsa, ecdsa, ed25519)
  -h, --help                 Print help
  -V, --version              Print version
If your NERSC username is not the same as your local username, you can specify your NERSC username with the -u option:
sshproxy -u elvis
If you would like to have a different name for the ssh key file, you can use the -o option to specify the output filename:
sshproxy -o mynersc
Note the -a option can be used to automatically add the new key to your ssh-agent. It will also be set with an expiration that matches the keys expiration so that ssh does not try to use the key after it has expired.
If your computer has an old version of ssh (e.g., OpenSSH_7.2), you may have to use the -a flag. Otherwise, ssh and scp commands will require additional flags to work as in the example cases shown below. To see the version info, run the command, ssh -V.
To generate a key for a collaboration account, use the -c option followed by the name of the collaboration account. You will authenticate using your personal password and MFA token. For example, here is how you would create a key for the collaboration account "cacct" for user "elvis". The generated key will have the same name as the collaboration account (e.g., cacct).
sshproxy -u elvis -c cacct
Long-term SSH Keys
The scope option (-s flag) is to accommodate special needs for your work. For cases where an automatic workflow requires long-term key you must make a request for a long term key. All requests are subject to review and if your request is approved we will provide information on how to set the scope.
SSH Configuration File Options
We recommend some options to put in your ssh config file. These options help avoid some potential problems with expiring ssh keys, and provide default key filenames to ssh so that you don't have to specify the key on the command line every time you use ssh. These options can all be overridden on the command-line at any time.
If you typically use only the default nersc key from sshproxy, you can modify your ssh config file to automatically use that key, instead of having to specify it on the command line every time. To do so, edit the file ~/.ssh/config on your local computer to include the following lines (assuming elvis is your NERSC username):
Host perlmutter*.nersc.gov saul*.nersc.gov dtn*.nersc.gov
    User elvis
    IdentityFile ~/.ssh/nersc
    IdentitiesOnly yes
    ForwardAgent yes
With that entry, whenever you ssh to one of those NERSC systems, your ssh client will automatically use your proxy key. If your local username is the same as your NERSC username, then you do not need to add the User elvis line. Otherwise substitute your NERSC username for elvis.
If your ssh client does not present a valid ssh key to the ssh server, the server will prompt you to authenticate with NERSC password + OTP. Neither the server nor the client will tell you that your key has expired.
After you set up ssh keys as above, you login with ssh to a NERSC computational machine without further authentication, as long as the keys haven't expired:
$ ssh perlmutter.nersc.gov
 *****************************************************************
 *                                                               *
 *                      NOTICE TO USERS                          *
 *                      ---------------                          *
...
$                    # You're on Perlmutter
After you log in, you can build your code, submit batch jobs, debug your code, etc. as you would normally do on any login node.
You can transfer a file to or from a NERSC machine with scp, in the same manner as you use ssh:
$ scp myfile perlmutter.nersc.gov:~
 *****************************************************************
 *                                                               *
 *                      NOTICE TO USERS                          *
 *                      ---------------                          *
...
myfile                                        100%   13     0.5KB/s   00:00
You will not be prompted to authenticate, either.
sshproxy on Windows Systems
The sshproxy client for Windows support ssh keys in both OpenSSH and PPK (PuTTY Private Key) formats. Upon successful authentication to the sshproxy server, the client generates an ssh key or keys that can be used for connecting to a NERSC computational host. With the key files, you can ssh to NERSC hosts without further authentication for key's lifetime (24 hours by default).
OpenSSH that is widely used on Linux and Linux-like systems is also available on Windows 10 (build 1809 or later) and Windows 11 systems. OpenSSH tools (ssh, scp, etc.) can be used in the command line as in Linux systems, in both PowerShell and Command Prompt although the former is recommended as Command Prompt is provided for backward compatibility. We will use PowerShell examples below. OpenSSH keys are also used when connecting to NERSC hosts with ThinLinc. For more info on OpenSSH keys on Windows systems, please see the Microsoft's Windows documentation pages, e.g., OpenSSH for Windows overview.
An ssh private key in the PPK format can be used for connecting to a NERSC computational host with PuTTY, a popular Windows SSH tool, or tools that support this format such as WinSCP.
Using sshproxy
Start PowerShell or Command Prompt. A quick way to do this is typing powershell or cmd in the search box in the taskbar. Run the downloaded executable with your NERSC username:
PS C:\Users\elvispc> sshproxy -u elvis
Password+OTP:

Successfully obtained ssh key C:\Users\elvispc\.ssh\nersc
Key C:\Users\elvispc\.ssh\nersc is valid: from 2025-01-07 11:43:00 -08:00 to 2025-01-08 11:44:09 -08:00
where elvis is assumed to be your NERSC login ID. You will be prompted to enter your NERSC password and OTP. Enter your NERSC password immediately followed by OTP as a single string, as before.
To use your institution's identity for login instead, use the -f flag for Federated ID:
sshproxy -f
A browser window will open, displaying the institution selection page. Use this browser window to log in. If you have recently authenticated, you may not be prompted for authentication.
Upon successfully authenticating, the client will install OpenSSH keys files in the C:\Users\elvispc\.ssh directory as shown below. If the directory doesn't exit, please create it.
PS C:\Users\elvispc> dir .ssh

    Directory: C:\Users\elvispc\.ssh

Mode                 LastWriteTime         Length Name
----                 -------------         ------ ----
...
-a---            1/7/2025 11:44 AM           1675 nersc
-a---            1/7/2025 11:44 AM           1512 nersc-cert.pub
-a---            1/7/2025 11:44 AM            426 nersc.pub
...
To generate a PPK file for PuTTY, instead, use the -p option. The key file will be in the C:\Users\elvispc\.ssh directory:
PS C:\Users\elvispc> sshproxy -u elvis -p
Password+OTP:

Successfully obtained PuTTY Key file C:\Users\elvispc\.ssh\nersc.ppk
Run "pageant.exe C:\Users\elvispc\.ssh\nersc.ppk" to load the key.
Then run putty instances like this: putty -agent <username>@perlmutter.nersc.gov


PS C:\Users\elvispc> dir .ssh

    Directory: C:\Users\elvispc\.ssh

Mode                 LastWriteTime         Length Name
----                 -------------         ------ ----
...
-a---            1/7/2025 11:52 AM           1438 nersc.ppk
...
Note that the executable generates OpenSSH keys when the key type is not specified, unlike the executable of the older version. In addition, the name of the PPK file is now nersc.ppk, not nersckey.ppk.
To add the key to SSH agent (ssh-agent with OpenSSH keys or pageant, PuTTY's ssh authentication agent, with a PPK file), use the -a option. By loading the key, you can ssh to NERSC machines without further authentication until the key expires or you log out, whichever comes first. For example, in case of using a PPK key:
sshproxy -u elvis -p -a
If there is a previously generated PPK file, you can alternatively run the pageant ... command above:
pageant C:\Users\elvispc\.ssh\nersc.ppk
Then, you can launch PuTTY as follows:
putty -agent elvis@perlmutter.nersc.gov
and it will connect to Perlmutter without asking for authentication.
If you see an error message that the key file is not "a recognized key file format," one possible suspect is that your authentication to the sshproxy server was not successful. Try running the sshproxy command again.
Note that you have to reload the key after you log out from the Windows machine and log back in if you want to use a unexpired key file that was generated previously. You can avoid this manual step by creating a ssh configuration as explained below.
sshproxy Command-line Options
sshproxy has several command-line options to override its default behavior. You can run sshproxy -h to get a help message:
PS C:\Users\elvispc> sshproxy -h
Get a NERSC keypair and certificate for password-free login for one day

Usage: sshproxy [OPTIONS]

Options:
  -u, --username <USERNAME>  The username to use
  -c, --collab <COLLAB>      The name of the collab group to use
  -s, --scope <SCOPE>        The scope to use
  -o, --out <OUT>            The name of the keyfile in ~/.ssh
  -k, --path <PATH>          The path to where the keyfiles will be stored. Defaults to $HOME/.ssh if empty
  -f, --fedid                Use fedid to log in
  -b, --no-browser           Don't open a web browser for fedid
  -p, --putty                Get keys in PuTTY compatible (ppk) format
  -a, --agent                Add key to ssh-agent (with expiration)
  -x, --proxy <PROXY>        Use socks proxy to connect to sshproxy server (format: <protocol>://<host>[:port])
  -t, --key-type <KEY_TYPE>  Specify the key type (no default, valid values are: rsa, ecdsa, ed25519)
  -h, --help                 Print help
  -V, --version              Print version
If you would like to have a different name for ssh key file(s), you can use the -o option to specify the output filename:
sshproxy -u elvis -o mynersc
Long-term SSH Key
The scope option (-s flag) is to accommodate special needs for your work. For cases where an automatic workflow requires a long-term key you must make a request for a long term key. All requests are subject to review and if your request is approved we will provide information on how to set the scope.
Login Using OpenSSH Keys
You can use the keys you get from the sshproxy to log in to NERSC systems by specifying the key file on the command line. For example, to log in to perlmutter.nersc.gov with a key named nersc:
ssh -i C:\Users\elvispc\.ssh\nersc elvis@perlmutter.nersc.gov
This will allow you to log in without having to authenticate again.
We recommend to put some common options in your ssh config file. These options help avoid some potential problems with expiring ssh keys, and provide default key filenames to ssh so that you don't have to specify the key on the command line every time you use ssh. These options can all be overridden on the command-line at any time.
If you typically use only the default nersc key from sshproxy, you can modify your ssh config file to automatically use that key, instead of having to specify it on the command line every time. To do so, edit the file C:\Users\elvispc\.ssh\config on your local computer to include the following lines:
Host perlmutter*.nersc.gov saul*.nersc.gov dtn*.nersc.gov
    User elvis
    IdentityFile C:\Users\elvispc\.ssh\nersc
    IdentitiesOnly yes
    ForwardAgent yes
With that entry, whenever you ssh to one of those NERSC systems, your ssh command will automatically use your proxy key.
If your ssh command does not present a valid ssh key to the ssh server, the server will prompt you to authenticate with NERSC password + OTP. Neither the server nor the client will tell you that your key has expired.
After you set up the ssh configuration as above, you login with ssh to a NERSC computational machine without further authentication, as long as the keys haven't expired:
PS C:\Users\elvispc> ssh perlmutter.nersc.gov
 *****************************************************************
 *                                                               *
 *                      NOTICE TO USERS                          *
 *                      ---------------                          *
...
$                    # You're on Perlmutter
After you log in, you can build your code, submit batch jobs, debug your code, etc. as you would normally do on any login node.
You can transfer a file to or from a NERSC machine with scp, in the same manner as you use ssh:
PS C:\Users\elvispc> scp myfile perlmutter.nersc.gov:~
 *****************************************************************
 *                                                               *
 *                      NOTICE TO USERS                          *
 *                      ---------------                          *
...
myfile                                        100%   13     0.5KB/s   00:00
You will not be prompted to authenticate, either.
Login Using PPK
As explained earlier, if a PPK was loaded to Pageant, you can ssh to a NERSC host using Pageant with the command:
putty -pageant elvis@perlmutter.nersc.gov
Then, a PuTTY window pops up that shows you are on Perlmutter.
Note that, if this is the first time logging in to the host, you may see a 'PuTTY Security Alert' window about the new host key encountered. If the key matches what is shown on the key fingerprints list, click the 'Yes' button.
If you are going to use the same PPK file name for all SSH sessions, you can set PuTTY configuration for using the PPK file. Then, you don't have to run the pageant command above each time you run sshproxy or when you log out from the Windows machine and log back in. To set the configuration, click on the PuTTY icon on your machine. Let's say that you want to create a configuration for connecting to Perlmutter,
-
Put
elvis@perlmutter.nersc.govin the 'Host Name (or IP address)' field (assumingelvisis your NERSC username). -
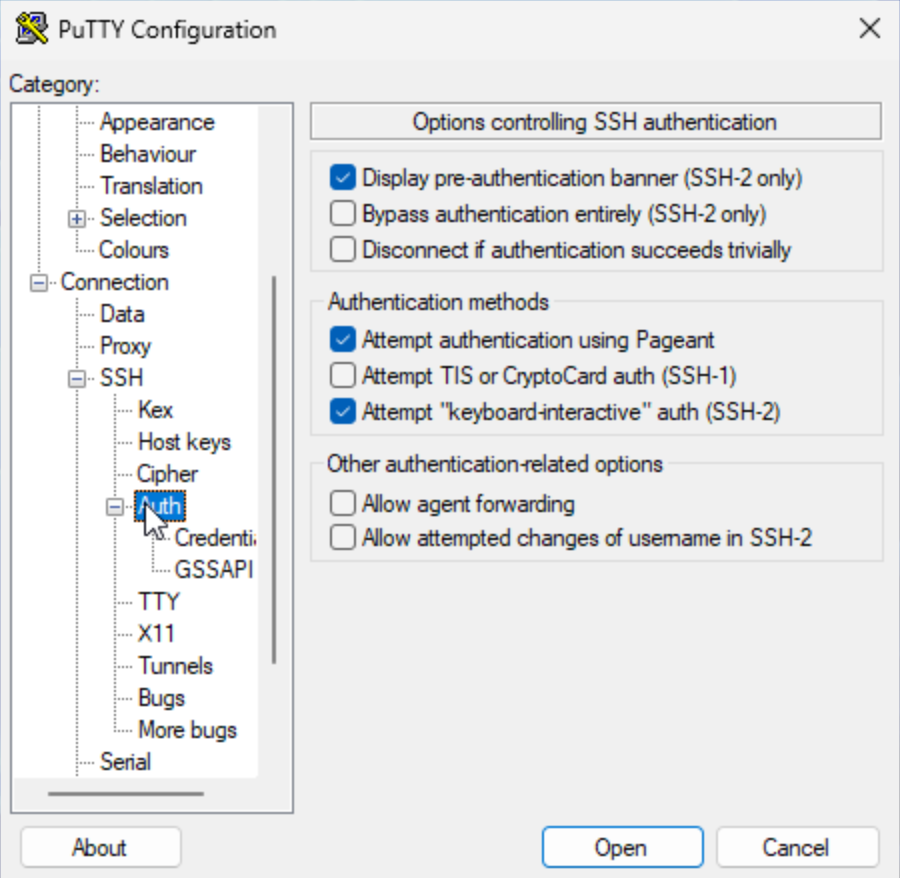
After selecting the 'Connection' category and 'Credentials' from the 'Auth' submenu, click the 'Browse...' button in the 'Private key file for authentication' field to select a PPK file.
-
Go back to the 'Session' category. Put a name in the 'Saved Sessions' field (e.g., perlmutter) and click the 'Save' button to save the configuration.
 {: align="center" }
 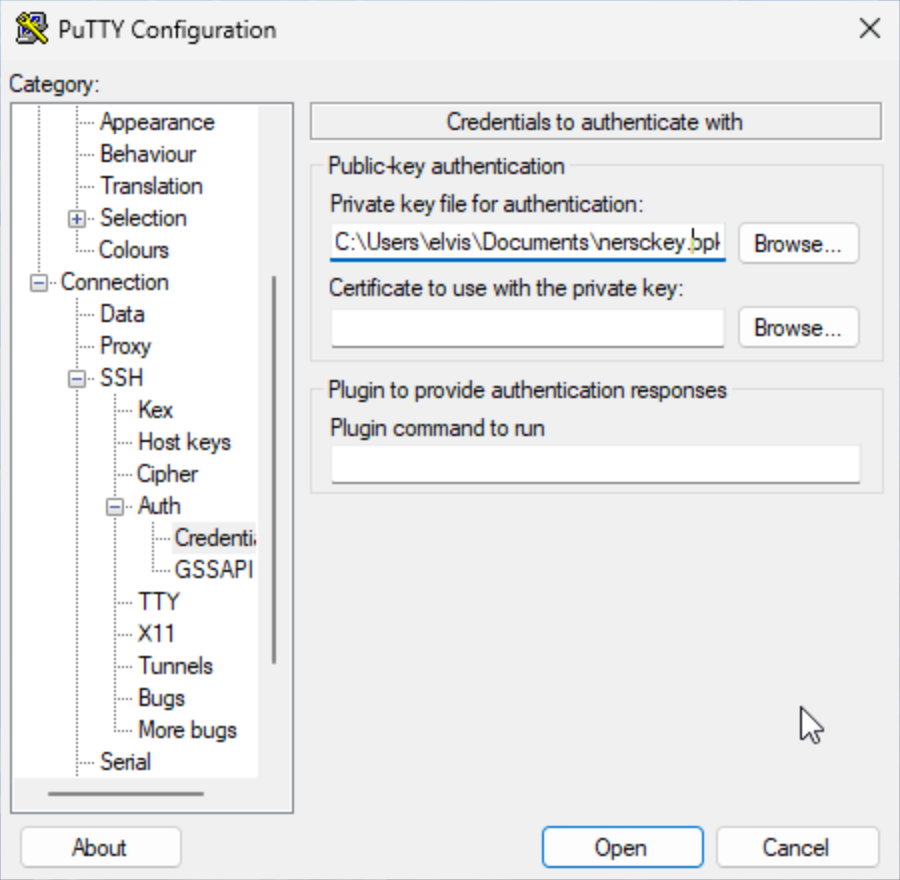 {: align="center" }
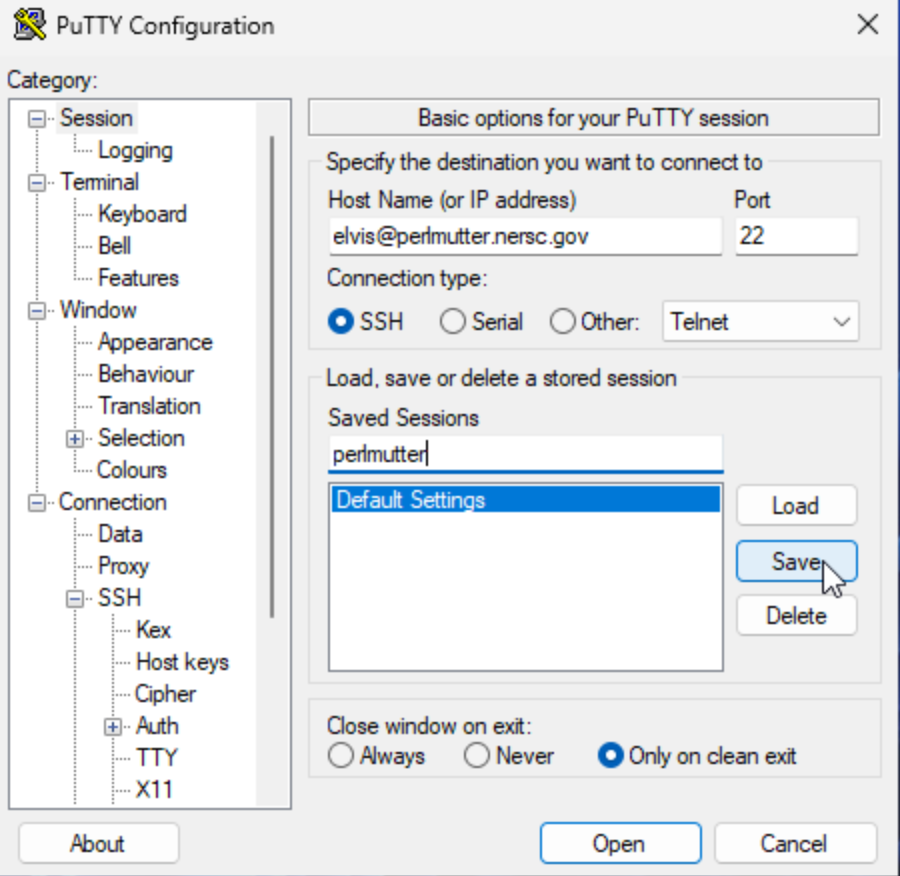
When you want to log in to Perlmutter next time, you choose that configuration in the 'Saved Sessions' area, click the 'Load' button and then 'Open'.
Login Attempts with an Expired Key
If you try to login with an expired key, the server will not tell you that the key has expired. It will just prompt you to login with MFA, as if you did not have an SSH key:
$ ssh perlmutter.nersc.gov
 *****************************************************************
 *                                                               *
 *                      NOTICE TO USERS                          *
 *                      ---------------                          *
...
Password + OTP:
You can generate new SSH keys by running the sshproxy executable at any time, as shown in the 'Using sshproxy' section above.
Host-Based Authentication
NERSC HPC hosts are configured to use SSH "host-based" authentication for logins among NERSC hosts. This means that, once you log in to one NERSC host from a remote host, you can SSH from there to another NERSC host without having to authenticate.
$ ssh perlmutter.nersc.gov
 *****************************************************************
 *                                                               *
 *                      NOTICE TO USERS                          *
 *                      ---------------                          *
...
$ echo $NERSC_HOST  # You're on Perlmutter
perlmutter

$ ssh dtn
***************************************************************************
                            NOTICE TO USERS
...
$ echo $NERSC_HOST         # You're on a DTN
datatran
MFA for MyProxy
The NERSC MyProxy service will require MFA-enabled users to authenticate using their password and OTP.
MFA for Web Services
Most NERSC web sites authenticate users using an authentication service, Shibboleth, which provides single sign-on capability across participating sites. This means, once you have authenticated to one NERSC site, you will be able to access all other sites using that service without having to authenticate again for 24 hours. Shibboleth will require MFA-enabled users to enter their OTP in addition to their password.
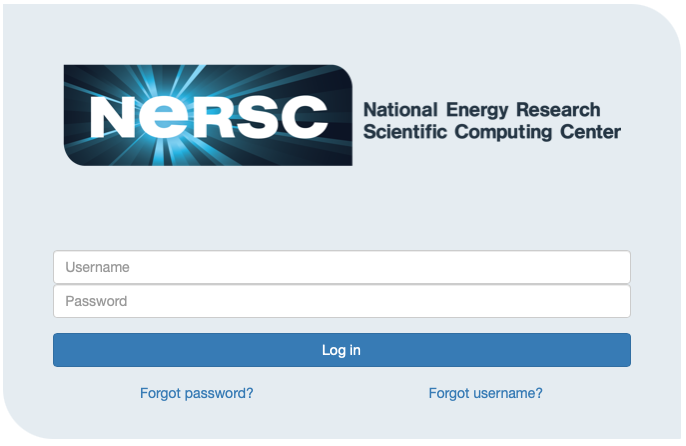
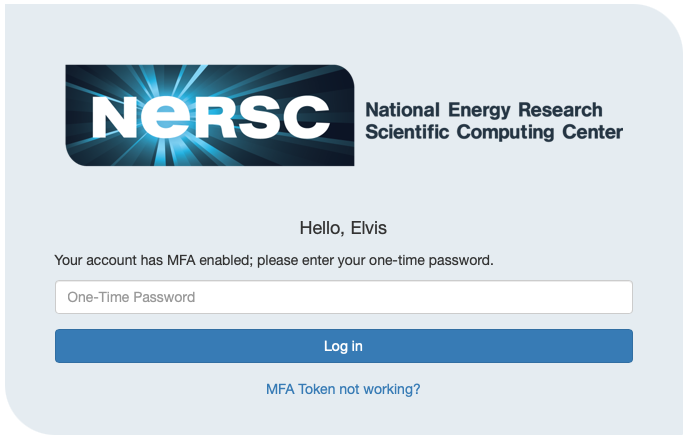
Sites that use Shibboleth will present a login page displays NERSC login banner as shown below. Login with your NERSC user name and password.
Then, you will be prompted to enter an OTP:
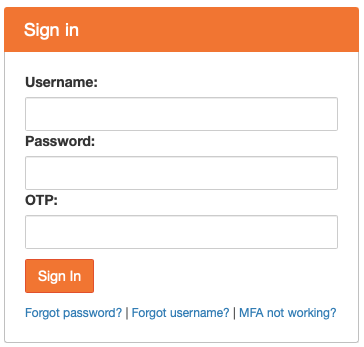
A few NERSC sites do not use Shibboleth for various technical reasons. For those sites, single sign-on is unavailable and you will have to individually authenticate to them using MFA. Login using NERSC password and an OTP:
Frequently Asked Questions (FAQ)
(Q) I don't have a smartphone or tablet. What do I do?
Please check the Using Desktop Tools section above.
We encourage you to install the app or a web extension on a different machine from the one you use to connect to NERSC for a security reasons.
(Q) Can I use OTPs generated on a device with clock drift?
This can happen a cellphone when traveling overseas with no cell phone connectivity.
The NERSC server adjusts for your clock skew and will drift with it, as long as each drift is less than 180 seconds. Where you will have a problem is if your clock drifts more than 180 seconds between successive MFA authentications. Most often that happens when your phone clock has been drifting for a while, then you get it online again, it syncs to the cell tower, and the clock suddenly changes by a large amount. In that case, the solution we have at the moment is to delete the token and have you create a new one.
(Q) What if I lose my device?
If you have another device where you have configured a NERSC MFA token with its app, you should log in to your Iris account as soon as possible and delete all the MFA tokens associated with the lost device.
If you have no other device, please follow the instructions in the 'If You Lost Your Tokens' section, to get an OTP that you will use to login into your Iris account.
(Q) I have two devices. How do I copy or transfer my token from one to the other?
If you are using Google Authenticator, then follow Google's instructions under the section "Transfer Google Authenticator codes to a new phone".
Alternatively, when Iris generates a QR code along with the "secret" code (see the 'Creating and Installing a Token' section), you can create a token on each device using the same QR or secret code, if you want. Then, if multiple devices' internal clocks are running at the same rate and the time on the devices is the same, the authenticator apps on the multiple devices will show the identical OTP.
(Q) MFA is enabled for my account but I didn't set a MFA token on an authenticator app. How can I log in to Iris to set it up?
Please follow the instructions in the 'If You Lost Your Tokens' section, to get an OTP that you will use to login into your Iris account in order to setup a MFA token.
(Q) I have enabled MFA. My logins fail repeatedly. What should I do?
If this is with a particular host (Perlmutter, etc.) only, then log in to your Iris account. Select the 'Profile' tab, and click the 'Account Locked?' button, and click the 'Unlock Account' button in a dialog box that will appear. That will clear login failures that may have accumulated for the host. Then, try to log in to the host again.
If you enter incorrect OTPs too many times, the NERSC MFA server locks you out. In that case, you have to wait for 15 minutes before you try again.
If you are using ssh keys generated via sshproxy for authentication, check if the keys have expired.
A popular way of using ssh key authentication is via ssh-agent, the "authentication agent." You add an ssh private key to ssh-agent and it uses the key to authenticate to a remote host that has the matching public key. You may be knowingly or unknowingly using this method (especially, when you use the -a option with sshproxy). Ssh-agent goes through the saved keys one by one to see if the correct key is found. If it cannot find the matching key within 6 tries, ssh authentication fails. When you have many keys stored in ssh-agent, including the correct one, login can fail if the correct key is not selected within the first 6 tries. To see how many keys are stored in ssh-agent, run the command ssh-add -l on your laptop/desktop. If you see many keys there, you can delete all of them with the command ssh-add -D and run the sshproxy command again. You can also selectively remove an individual key with the -d flag (for info, see the ssh-add man page).
If you added an ssh key in ssh-agent by running a sshproxy -a ... command in a previous login session for your local machine (that is, you logged out from your local desktop/laptop and logged back in now) and if you still want to use the key for ssh'ing to NERSC hosts, make sure you have the key added to ssh-agent manually.
If you don't remember your password, then follow the steps in the 'Forgotten Passwords' section.
If all your MFA tokens don't seem to work, click the 'Lost your tokens?' link in the Iris login page) to request for a single-use OTP that you can use to log in to your Iris account. Delete all the MFA tokens in Iris, and create a new one.
(Q) Can I use the same OTP to log in to multiple resources?
No, it will not work. It's because an OTP (One Time Password) can be used only once for authentication. You have to wait until the next 30-second time window starts to get a new OTP.
(Q) We are running automated jobs on NERSC machines. How can we continue to do this with MFA?
Please try the sshproxy service. It currently serves keys that are good for 24 hours, but longer ones are possible, depending on what your needs are. To request for long-term keys you need to supply additional details about your workflow so that we may review the request.
(Q) What if a NERSC resource doesn't support MFA yet?
You can log in to that resource with your NERSC password only.
(Q) How can I use a tool that requires authentication to a NERSC host?
Examples
- BBEdit
- FileZilla
- WinSCP
- etc
If the tool supports ssh key authentication, you can use the SSH keys generated by the sshproxy client. In that case, the settings in the 'SSH configuration File Options' section above can be the only thing required for authenticating properly. Please check the tool's user manual or documentation for specific info. BBEdit and FileZilla support ssh key authentication although FileZilla appears to require some manual setup.
If you use WinSCP, select 'SCP' in the 'File protocol' field and enter your username in the 'User name' field in the 'Login' window. Leave the 'Password' field blank. Then, click the 'Login' button. Click 'Continue' in the 'Authentication Banner' window. Then, you will see the 'Server prompt' window where you enter your password immediately followed by an OTP.
(Q) Can I access 3rd party hosts from NERSC with my personal ssh keys?
Yes. SSH keys generated on your laptop/desktop with the public key stored in a 3rd part host such as GitHub or GitLab can be used via SSH Agent Forwarding.
If your laptop/desktop is a Linux-like machine, set ForwardAgent yes in ~/.ssh/config. Run ssh-add with the private key before you ssh to a NERSC host. After you're on the NERSC host, run ssh-add -L to confirm that the key is included.
Questions, Comments, ...
If you have any questions, problems or comments, please contact us via the NERSC Help Desk.