VisIt
Introduction
VisIt is an open-source, interactive, scalable visualization, animation, and analysis tool. From Unix, Windows, or Mac workstations, users can interactively visualize and analyze data ranging in scale from small (<10 core) desktop-sized projects to large (>10,000 core) leadership-class computing facility simulation campaigns. VisIt supports a rich set of visualization features to enable users to view a wide variety of data, including scalar and vector fields defined on two- and three-dimensional (2D and 3D) structured, adaptive, and unstructured meshes. VisIt is capable of visualizing data from over 120 different scientific data formats1. For a list, please see:
VisIt Supported Scientific Data Formats
Remote Visualization with VisIt
VisIt is configured to run as a client-server application. VisIt will run on your local desktop while the remote server will run on NERSC's machines. The VisIt client will connect to the server to browse files, launch jobs, and run commands.
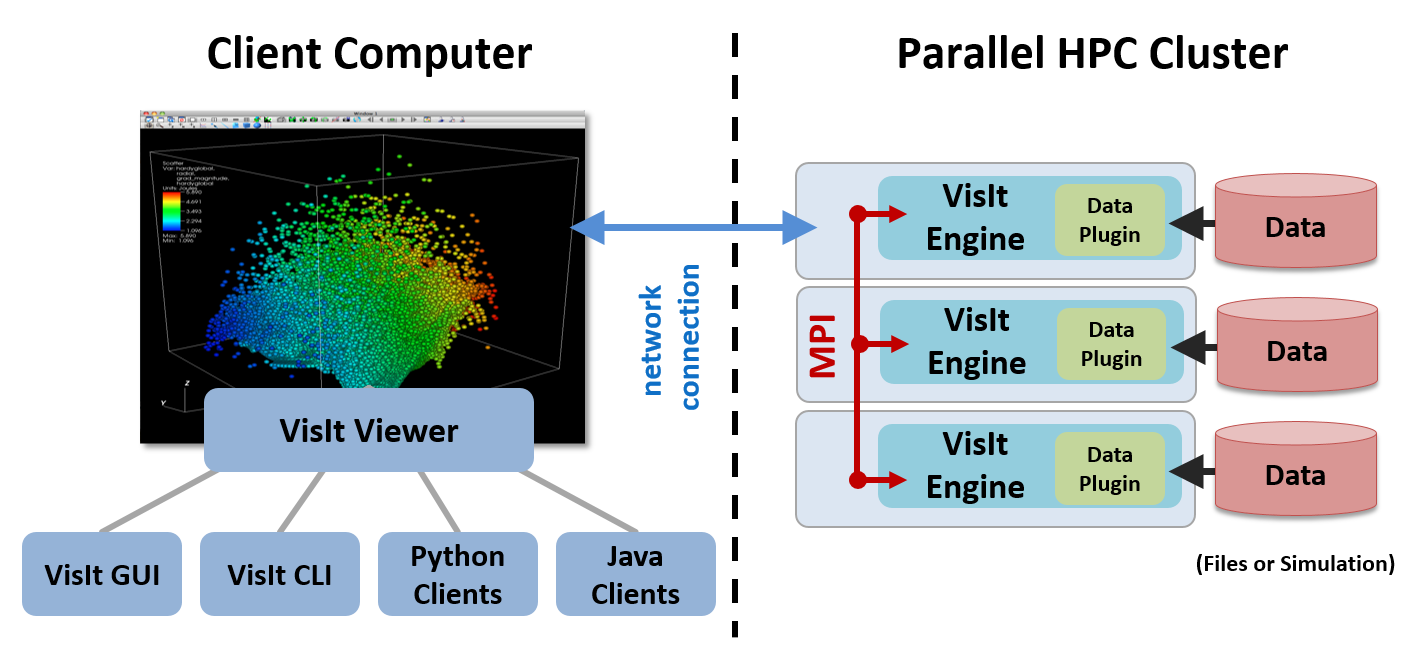
The following steps describe how to install VisIt on your desktop and configure it so that you can launch parallel jobs on NERSC's systems from within the VisIt GUI. Running VisIt in a client-server configuration requires establishing an SSH tunnel to the login node, launching the VisIt server, and connecting the client over the tunnel via a socket. These actions are completed behind the scenes and, for the user, the experience is the same as using VisIt on their local machine.
Install the VisIt Client
Download VisIt
The first step is to install VisIt. On your local workstation, we recommend you use the binaries that match the installed version at NERSC. This ensures client-server compatibility.
| System | VisIt Version | Status | URL |
|---|---|---|---|
| Perlmutter | 3.4.1 | Recommended | VisIt-3-4-1-Release |
Several methods of installation are available. Please choose whichever is appropriate for your local machine. You can find additional download and installation directions for VisIt at their website.
Install the NERSC Host Profile
After installing VisIt, you will need to install and load a new host profile for usage at NERSC. Please click the link below to download the file:
VisIt will search for host configurations in $HOME/.visit/hosts on your local machine. Please save the downloaded host configuration to this location.
Start VisIt and Connect
When you start VisIt, you should now be able to connect to Perlmutter. For example, you can list your files by selecting "Open File..." and then choosing "perlmutter.nersc.gov" as the host. If you're able to browse your files on Perlmutter, then the VisIt client has successfully connected to the remote server.
VisIt Discussions
Users can browse Q&A and ask their own questions about VisIt at the official VisIt GitHub discussions website: github.com/visit-dav/visit/discussions.