ParaView
Introduction
ParaView is an open-source, multi-platform data analysis and visualization application. ParaView users can quickly build visualizations to analyze their data using both qualitative and quantitative techniques. The data exploration can be done interactively in 3D or programmatically using ParaView's batch processing capabilities. ParaView was developed to analyze extremely large datasets using distributed memory computing resources and can be run on supercomputers to analyze terascale datasets, as well as on laptops for smaller data.
Remote Visualization with ParaView
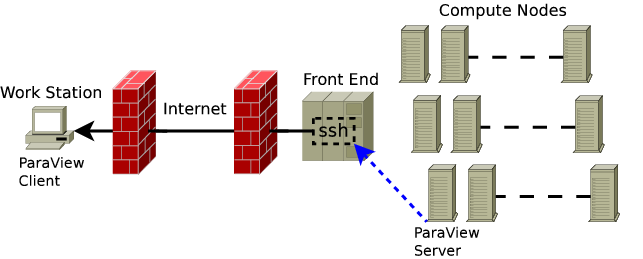
ParaView is a client-server application. The ParaView client (or simply paraview) will run on your desktop while the server will run at the remote supercomputing site. The following describes the steps you will take to install ParaView on your desktop and configure it so that you can launch parallel jobs on remote systems from within the ParaView GUI. Running ParaView remotely in a client-server configuration involves establishing an ssh tunnel to the login node, launching the ParaView server, and connecting the server to the client over the tunnel via a socket.
Install the ParaView Client
The first step is to install ParaView on your local machine. It is recommended that you use the binaries provided by Kitware on your workstation matching the NERSC installed versions. This ensures client-server compatibility. The version number that you install must identically match the version you intend to connect to at NERSC.
| System | ParaView Version | Status |
|---|---|---|
| Perlmutter | 6.0.0 | Available |
| Perlmutter | 5.13.3 | Available |
| Perlmutter | 5.12.0 | Available |
| Perlmutter | <5.12.0 | Deprecated |
Use the following link to download the correct ParaView client binary version for your desktop environment: ParaView binaries.
Install Dependencies
In order to use ParaView remotely you will also need an ssh client and a terminal program.
- Linux. On Linux this functionality is provided by the ssh and xterm programs. These may need to be installed on Linux systems using your distribution's package manager, e.g. apt or dnf.
- Windows. On Windows the ssh and terminal functions are provided by the programs plink.exe and cmd.exe, of which only cmd.exe will come pre-installed. The ssh client, plink.exe, needs to be installed before using ParaView. This program can be installed using the Windows installer from the PuTTY download site. The PuTTY install folder needs to be added to the system path after the install. This can be done in the Windows control panel, by opening Control Panel\System and Security\System , opening the Advanced System Settings page, and opening the Environment Variables dialog box.
- MacOS. On MacOS one may use the terminal provided by Apple and NERSC provided OSA script to connect to NERSC. The OSA script is provided in the following section. Alternatively on MacOS one may connect to NERSC servers via the Linux like configuration once XQuartz is installed. XQuartz may be installed on MacOS using brew.
Install the NERSC server configuration
NERSC provides an integrated server configuration that enables "point and click" ssh tunnel configuration, job configuration and submission, enabling users to quickly launch the ParaView server on NERSC systems.
- Close any instances of ParaView running on your desktop.
- Download the appropriate NERSC server configurations to your laptop or desktop. You can click to download or follow the link to copy the contents and save as the corresponding pvsc filename.
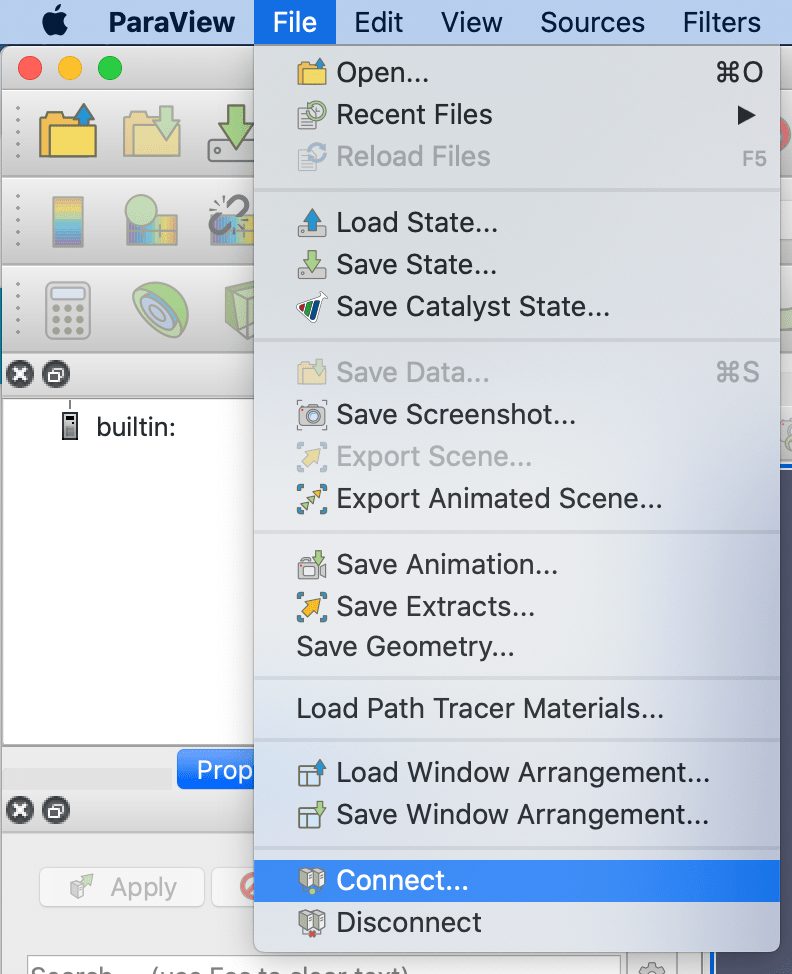
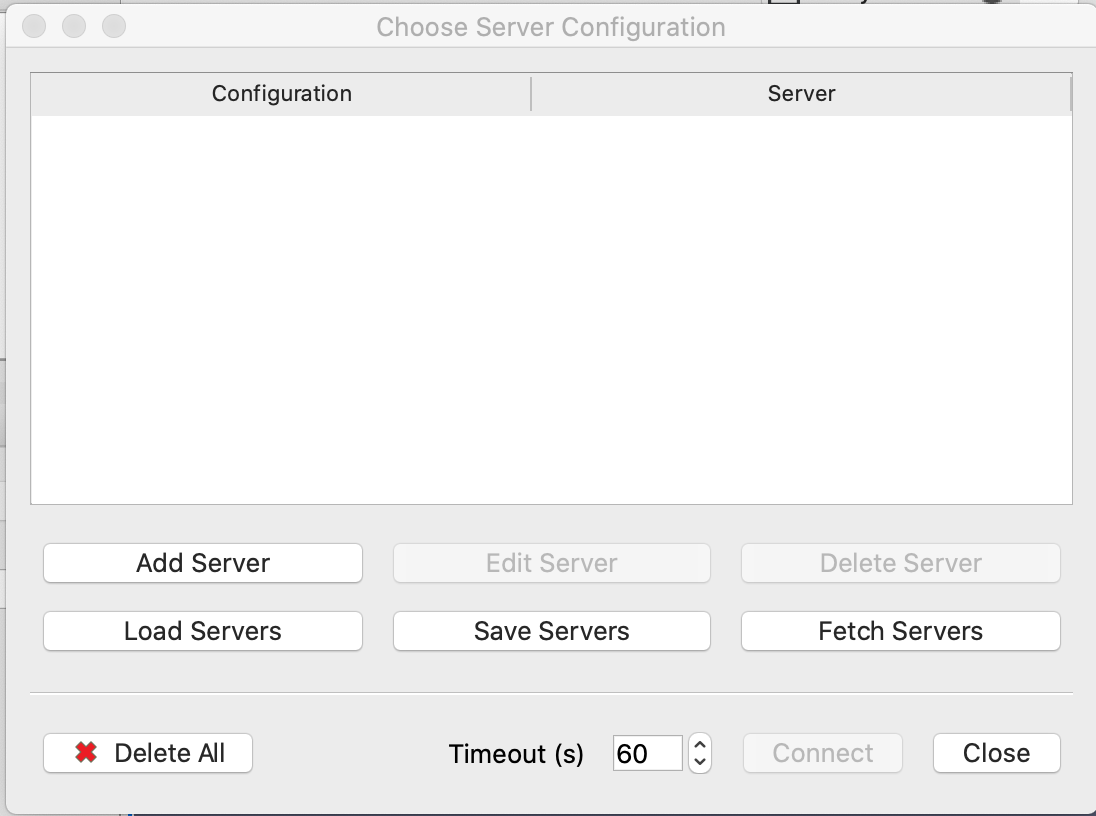
- Open the ParaView client and click the Connect button or from the File menu choose connect. In the choose a server dialog box click the load servers button and select the NERSC server configuration.
The NERSC server configurations will now show up in ParaView's connect menu.
Select The Appropriate Server Configuration From The Table
| ParaView Version | Operating System | ParaView Configuration | Launch Script |
|---|---|---|---|
| 6.0.0 | Linux | perlmutter-unix-v6.pvsc | none |
| 6.0.0 | Windows | perlmutter-win-v6.pvsc | none |
| 6.0.0 | MacOS | perlmutter-macos-v6.pvsc | perlmutter-macos.scpt |
| 5.13.3 | Linux | perlmutter-unix-v5-13.pvsc | none |
| 5.13.3 | Windows | perlmutter-win-v5-13.pvsc | none |
| 5.13.3 | MacOS | perlmutter-macos-v5-13.pvsc | perlmutter-macos.scpt |
| 5.12.0 | Linux | perlmutter-unix.pvsc | none |
| 5.12.0 | Windows | perlmutter-win.pvsc | none |
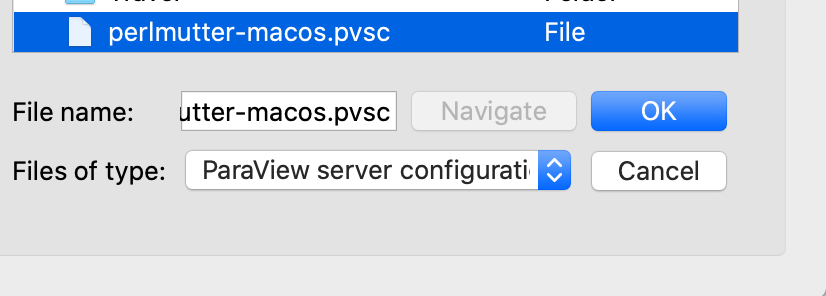
| 5.12.0 | MacOS | perlmutter-macos.pvsc | perlmutter-macos.scpt |
Note: The MacOS configuration requires an additional launch script which must downloaded and saved locally with execute permissions. When connecting to NERSC the first time through ParaView one must locate this file in the launch dialog. This should only be necessary on the first connection. Alternatively one may use the Linux configuration on MacOS if XQuartz (or some other X11 implementation) is installed.
Connecting to the Server on NERSC Systems
The steps are summarized below.
-
Download the configuration script from the table above that corresponds to your operating system.
For MacOS: Download both the
perlmutter-macos.pvscand the launch scriptperlmutter-macos.scpt.Make sure to give execute permissions to the script(s) by executing the
chmod +x perlmutter-macos.pvscandchmod +x perlmutter-macos.scpt(for MacOS) commands in the terminal. -
Open ParaView and select File->Connect from the menu.
-
Select Load Servers in the window that pops up.
-
Select the pvsc file in the pop-up window. Click OK.
-
Click Connect on the window in Step 3. Configure the run by setting the username, account, architecture (cpu/gpu), number of processes, processes per socket, job wall time and QOS in the next pop-up window. Click OK.
For MacOS: specify the path and name of the launch script,
perlmutter-macos.scptin the last field.One common issue for Mac users is that the ParaView client sometimes reports
"The process failed to start. Either the invoked program is missing, or you may have insufficient permissions to invoke the program.". To resolve this, make sure to give the full path of the launch script -<path>/perlmutter-macos.scptin the last field, and give execute permissions to the configuration and launch (for MacOS) scripts as given in Step 1.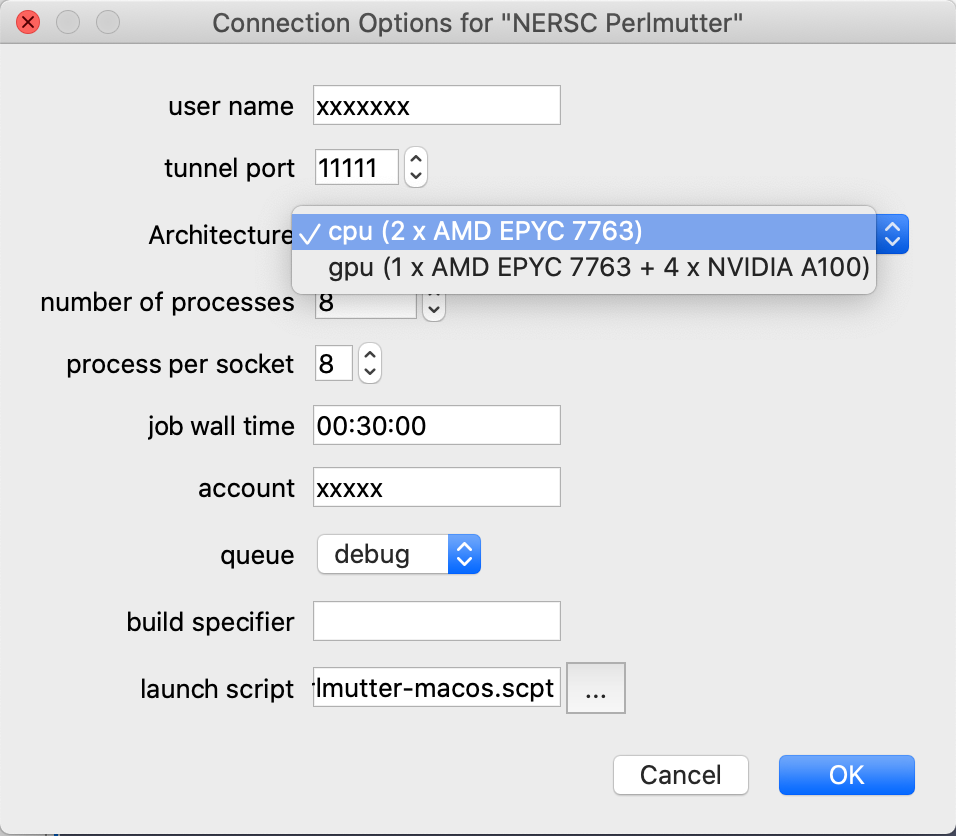
-
The Starting server dialog will be shown while the client waits for the server to start and connect back.

-
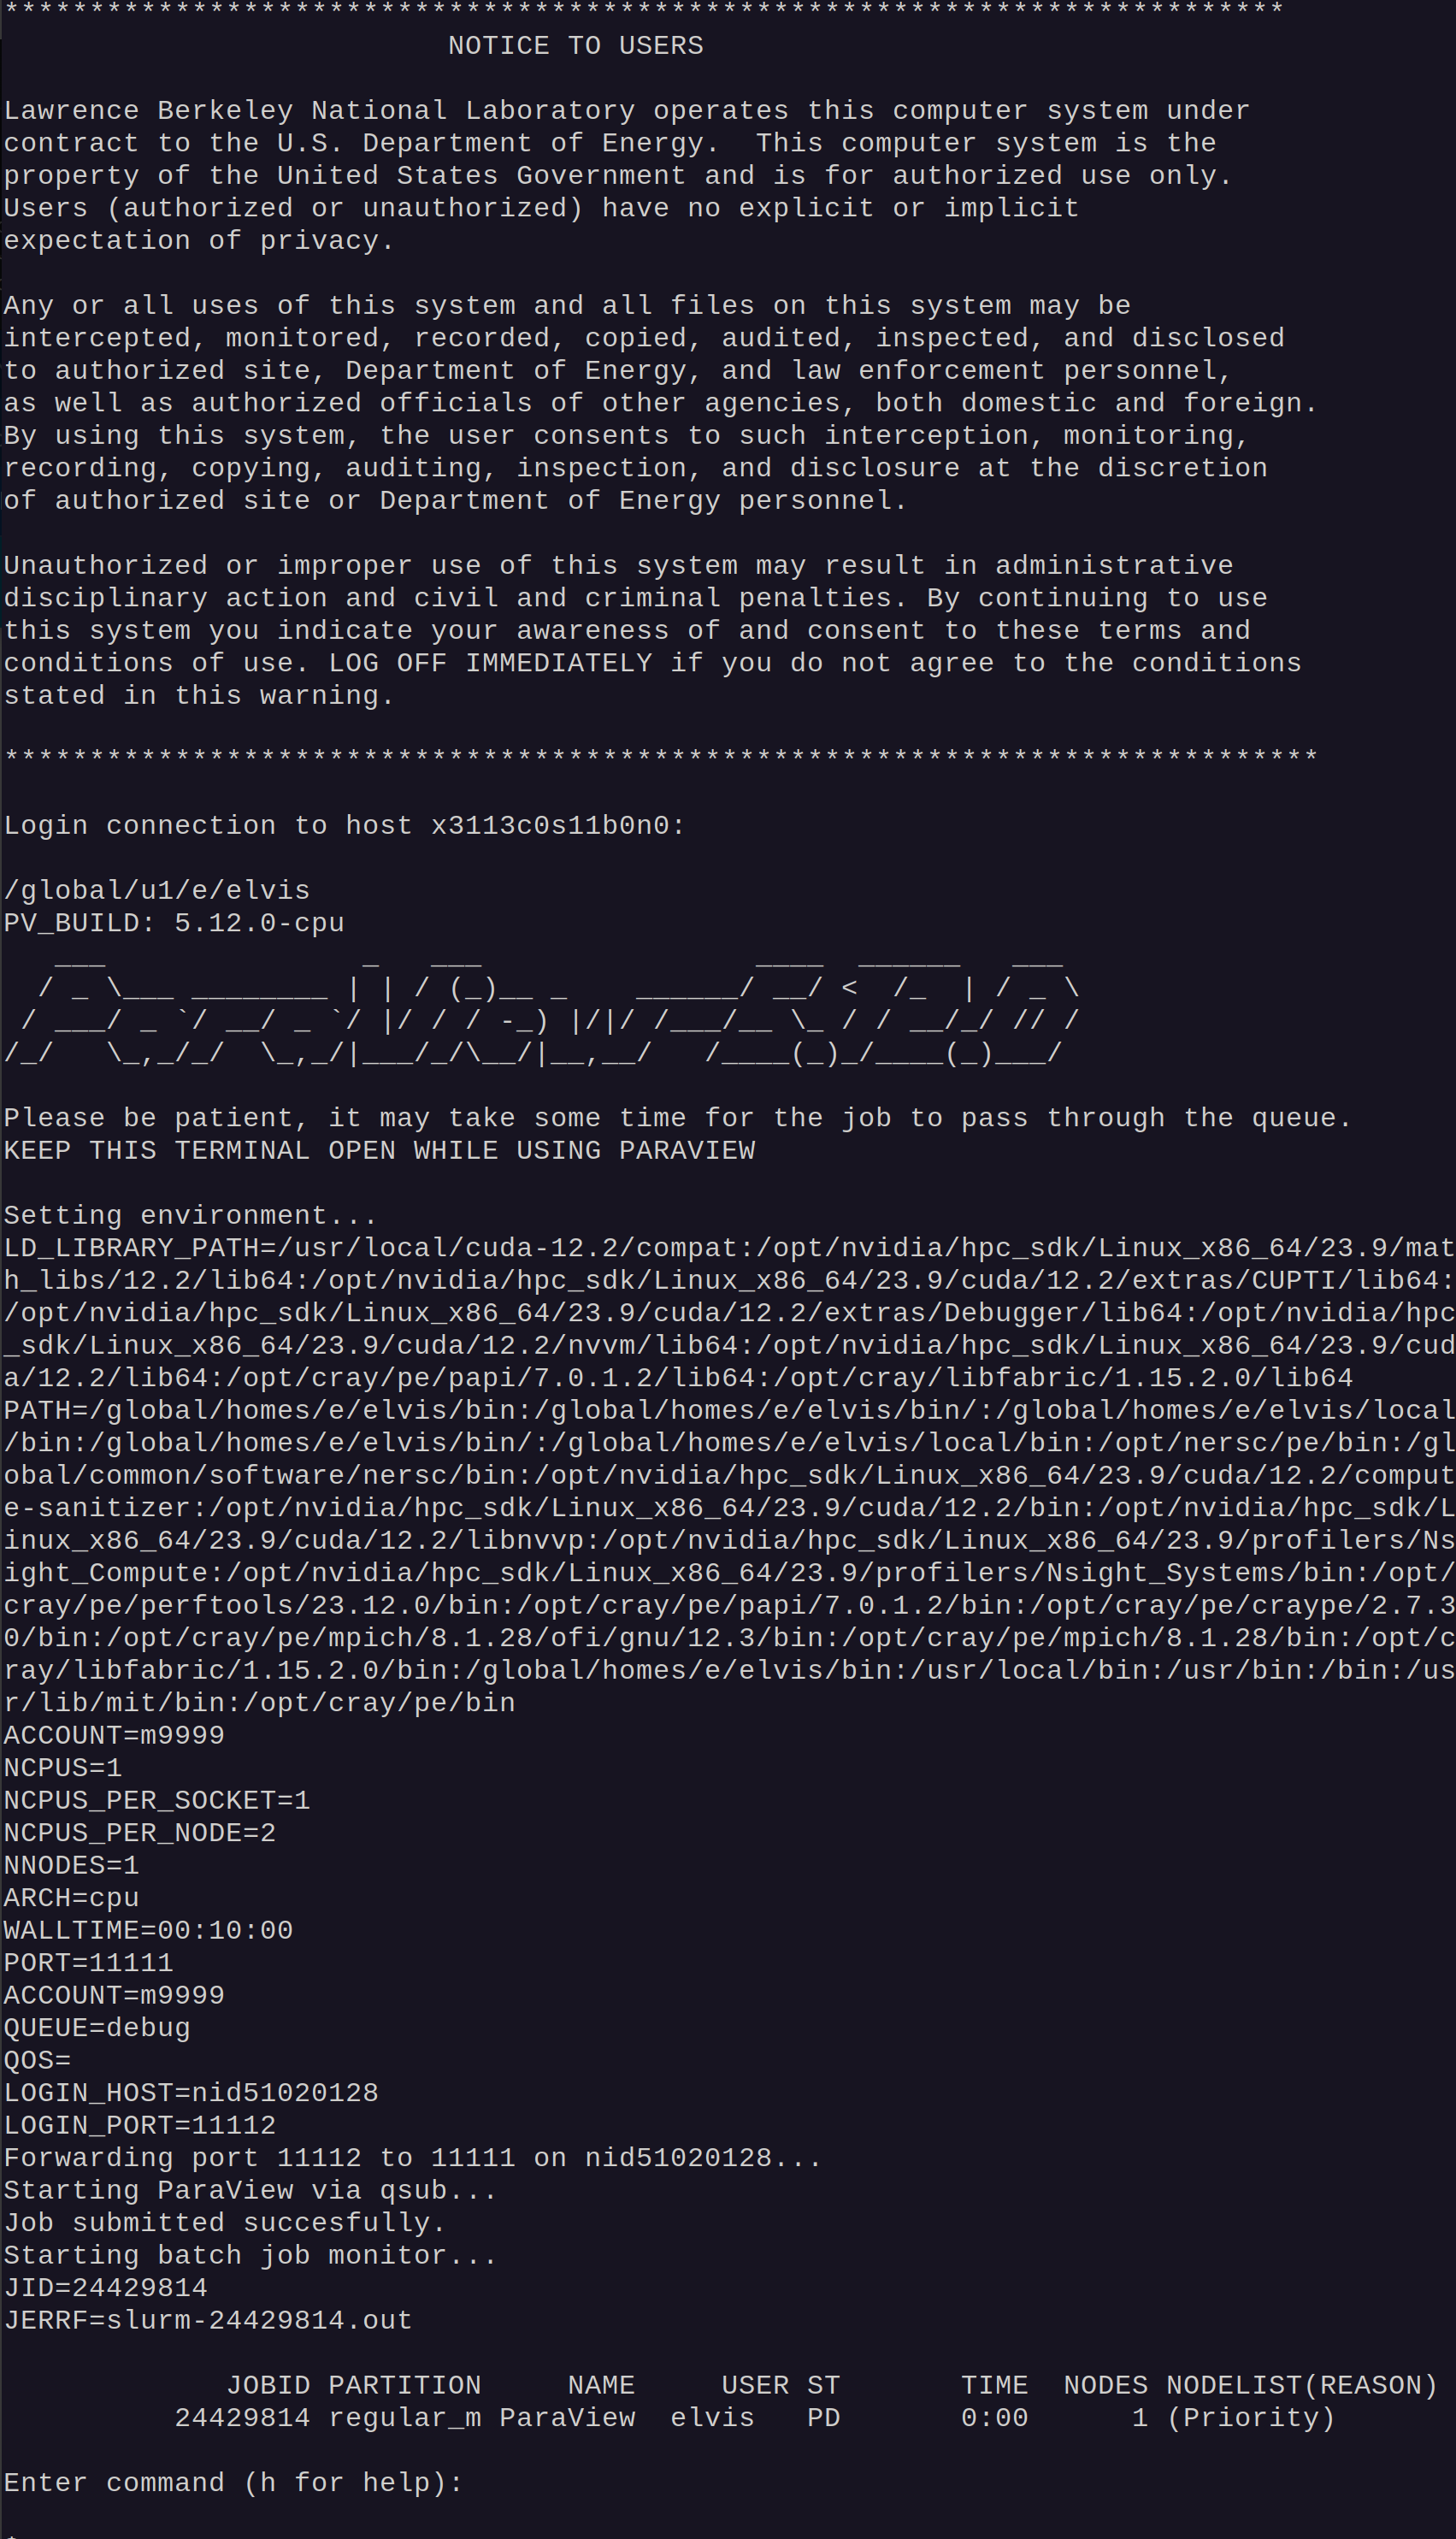
The server configuration script will start an xterm allowing you to login to the selected system. Enter the Password+OTP and login. Click the Enter button. Then you can see that the job has been submitted to the queue. Press u to see the status of the job. The tunnel is established between the workstation and the remote system once the job is allocated. This window needs to stay open while you use ParaView. See the image immediately below for a similar example.
Running in Batch Mode
In batch mode the ParaView server runs on its own without a client executing a python script. Batch mode provides a way to automate common visualization tasks and alleviates the necessity of being present when the job executes. Log in to the desired system, and submit your job using the batch script pvbatch.
For more information execute pvbatch --help and an explanation of the required command line arguments will be printed.
Example ParaView Batch Python Script
The following ParaView batch script renders a sphere colored by MPI Rank. It can be used for basic testing.
from paraview.simple import *

s = Sphere()
s.ThetaResolution = 128
s.PhiResolution = 128

p = ProcessIdScalars()

rep = Show(p)
Render()

lr = p.PointData.GetArray("ProcessId").GetRange()
lut = GetColorTransferFunction("ProcessId",
          RGBPoints=[lr[0], 0.0, 0.0, 1.0, lr[1], 1.0, 0.0, 0.0],
          ColorSpace='Diverging',
          VectorMode='Magnitude',
          ScalarRangeInitialized=1.0)

rep.ColorArrayName = 'ProcessId'
rep.LookupTable = lut

Render()

SaveScreenshot('pvbatch-test.png')
See Also
ParaView home page. http://www.ParaView.org